
In crochet, there are two types of decrease stitches. One is more general and the other is more specific to amigurumi. The first is a regular decrease, and the second is an invisible decrease. Let's get into it!
(Regular) Decrease
This decrease is likely the first method you learned. It's the classic way to reduce your stitch count and is more commonly used in flatter projects, such as blankets, clothing and granny squares. In a pattern, it's written as "dec", for example "dec6" or it's written as "sc2tog" which stands for "single crochet 2 together".
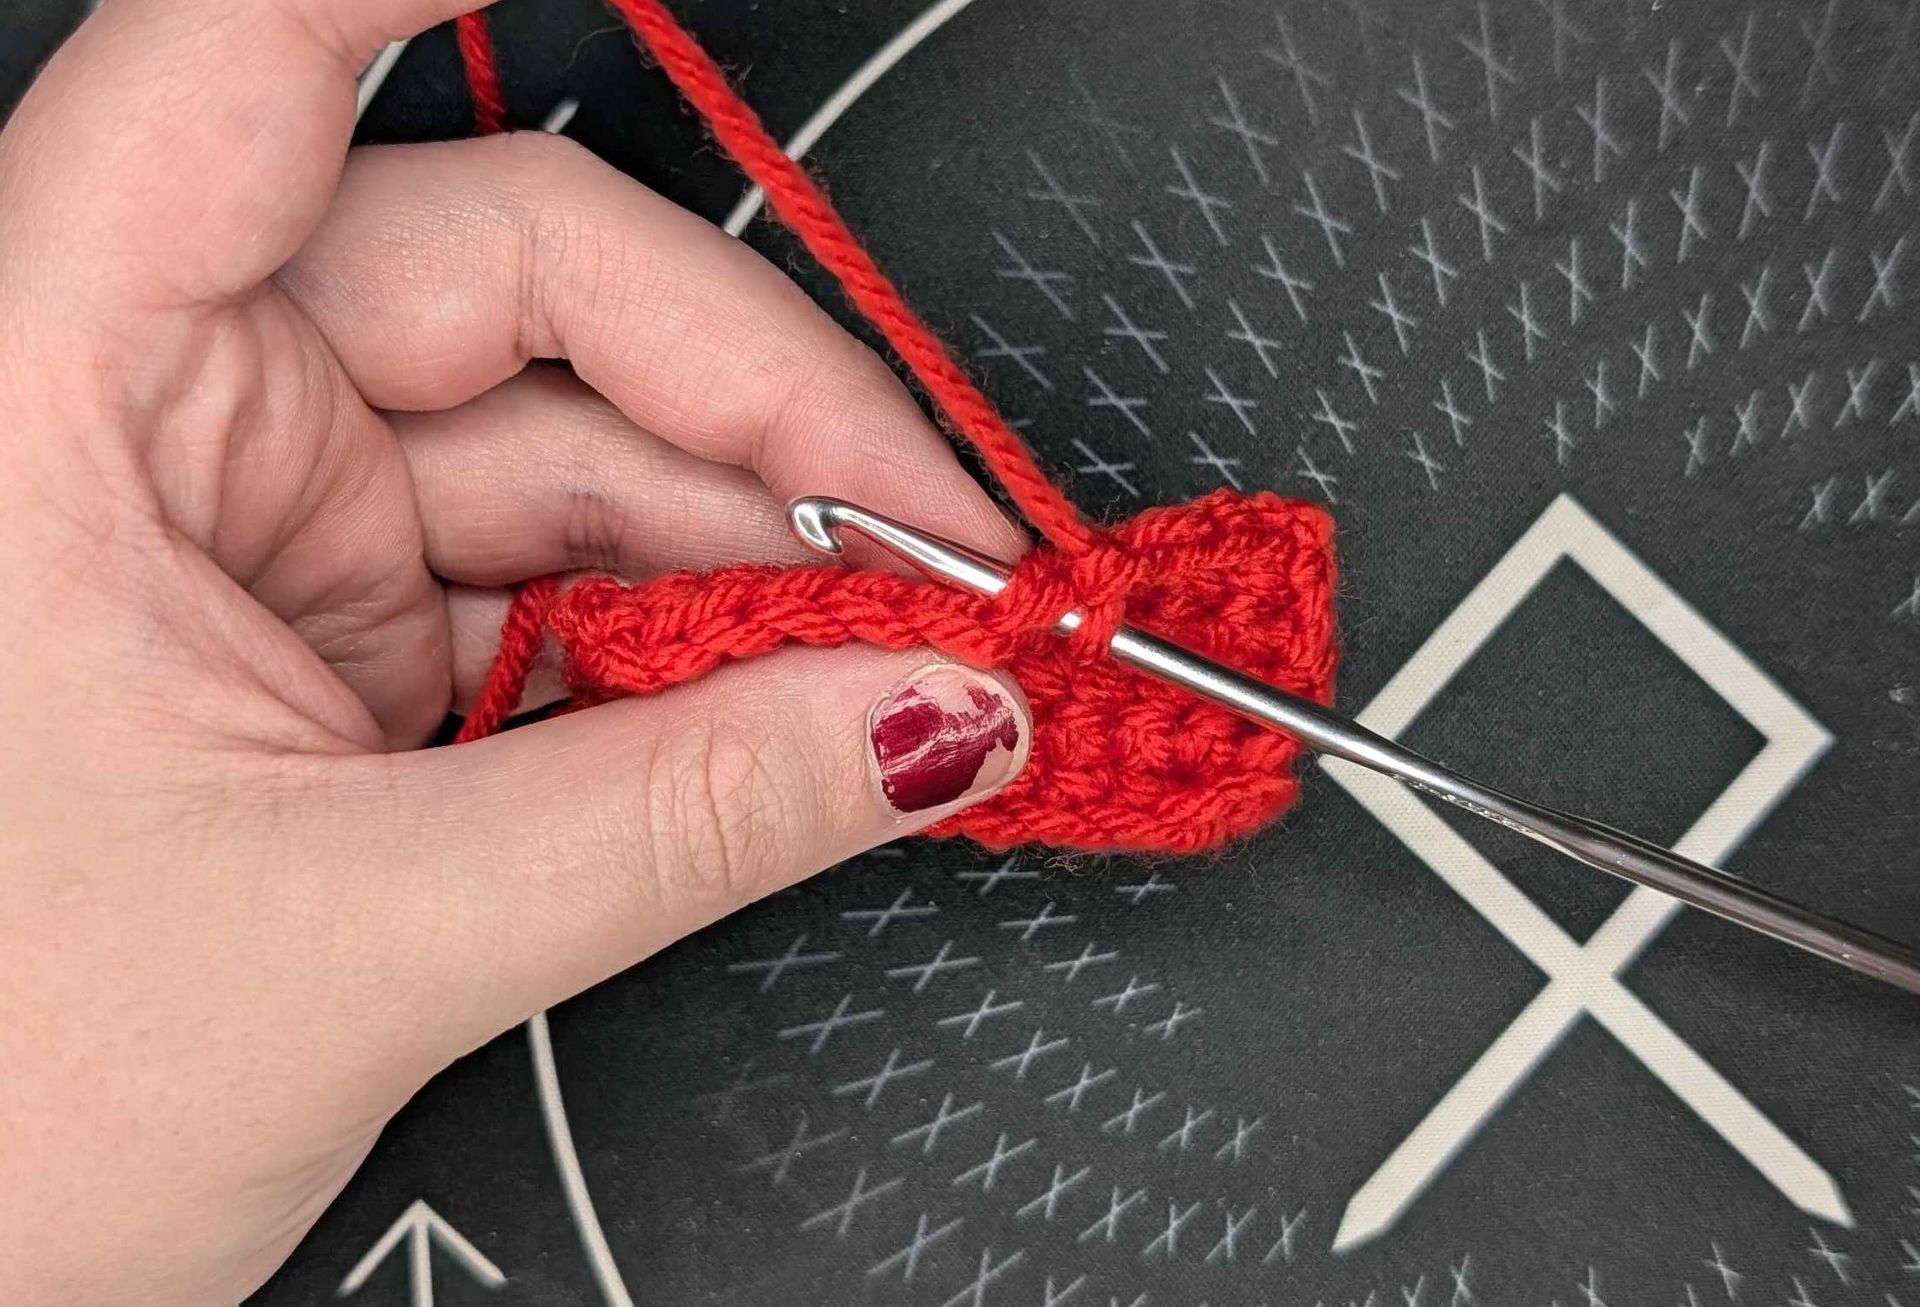
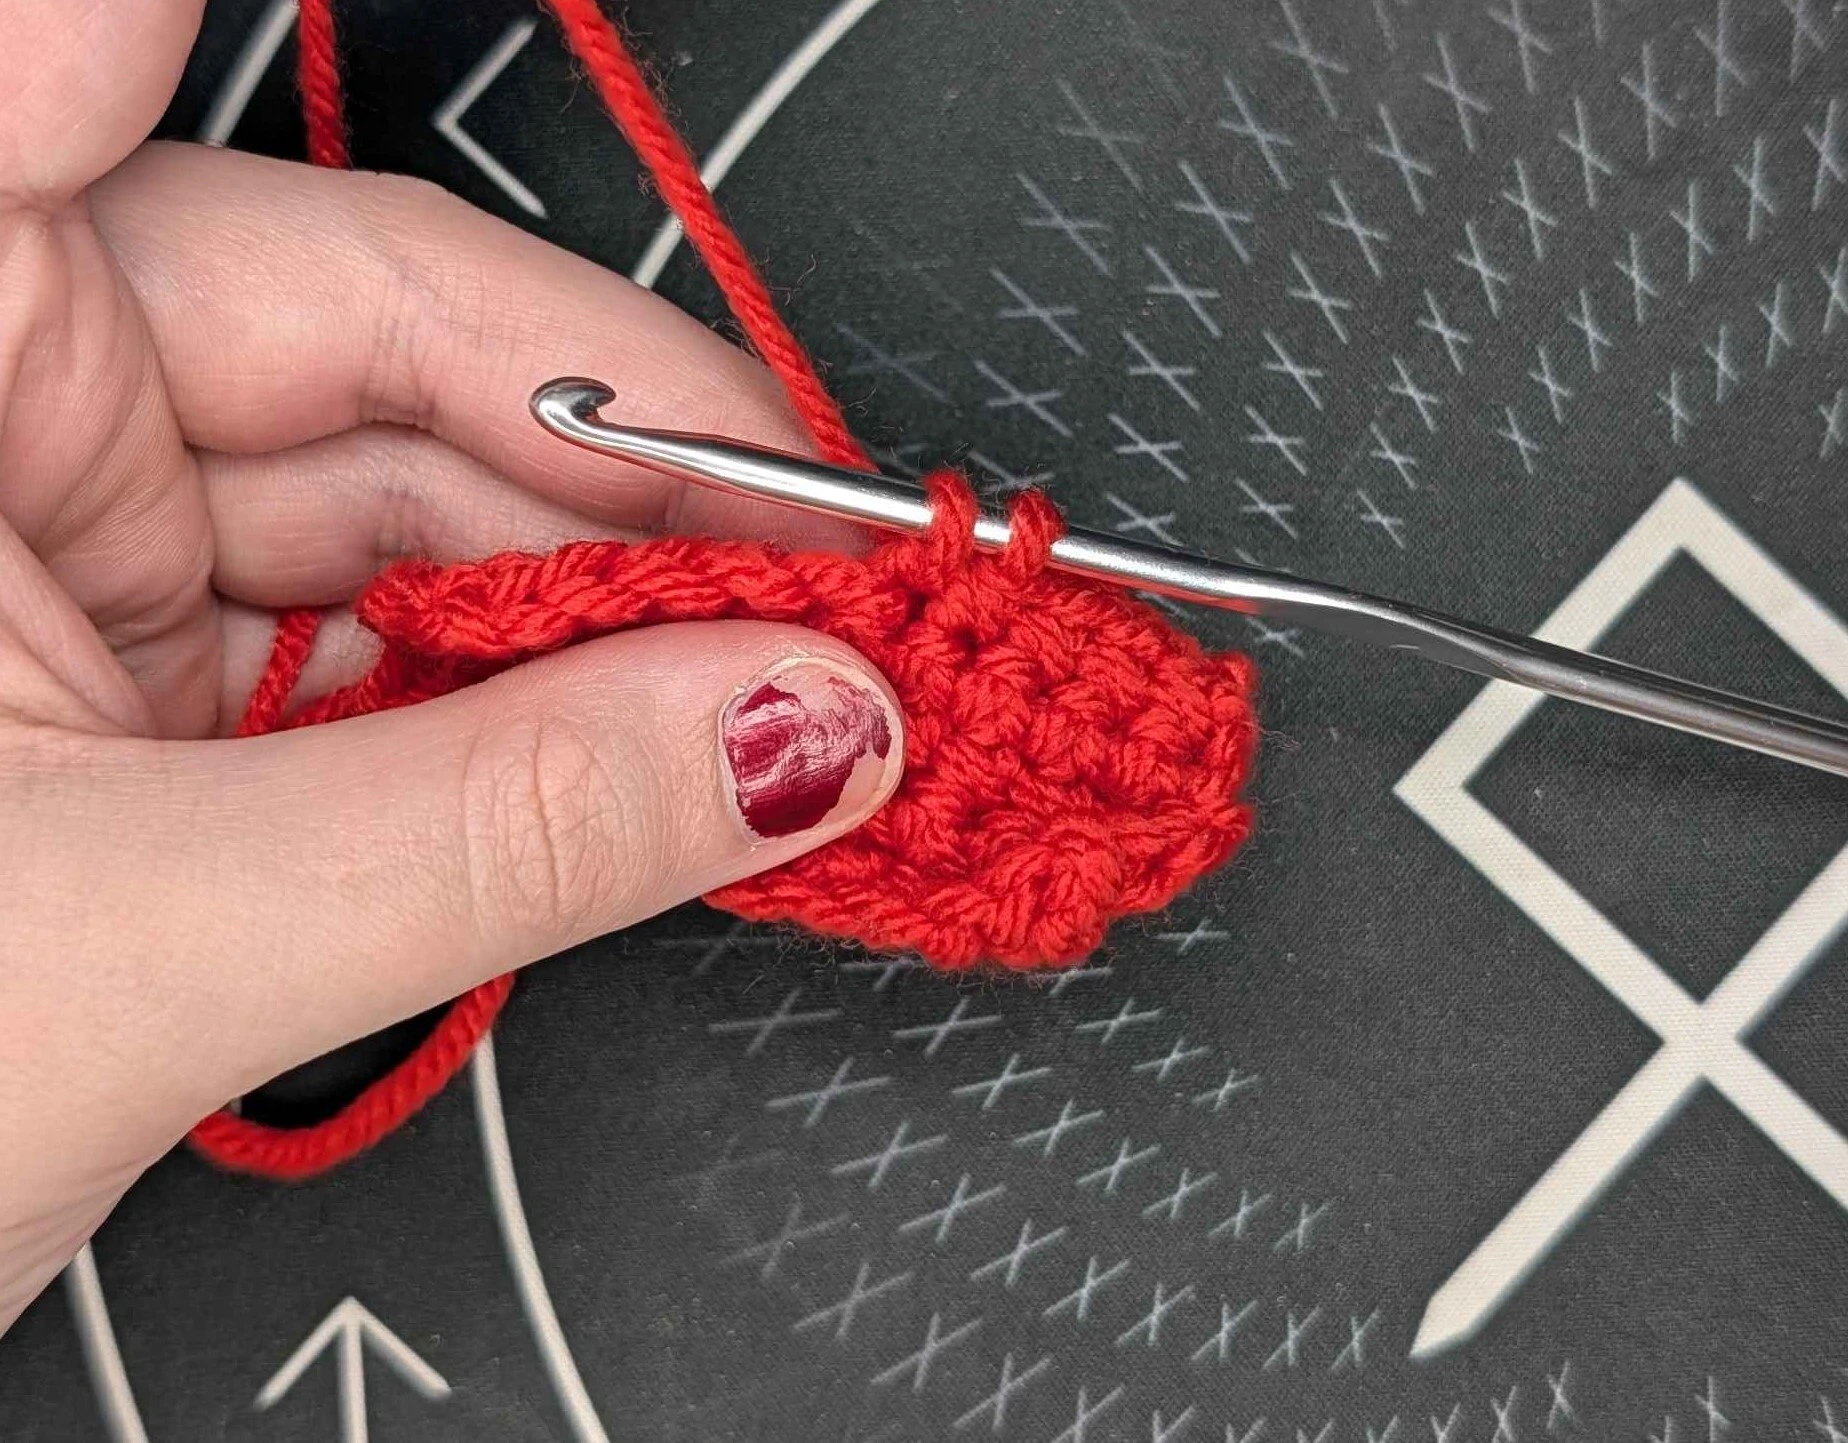
How to do a decrease:
- Insert your hook into the next stitch and pull through a loop (should have two loops on your hook).
- Insert your hook into the next stitch after that, and pull through another loop (should have three loops on your hook now).
- Yarn over and pull through all three loops on your hook.
Some pros and cons for a decrease stitch:
Pros:
- It creates a sturdy, thicker stitch.
- It's easy to see when you're counting your stitches.
Cons:
- It leaves a raised bump and a clearly visible gap.
- If using in amigurumi, the tension of the yarn will often reveal the stuffing inside.
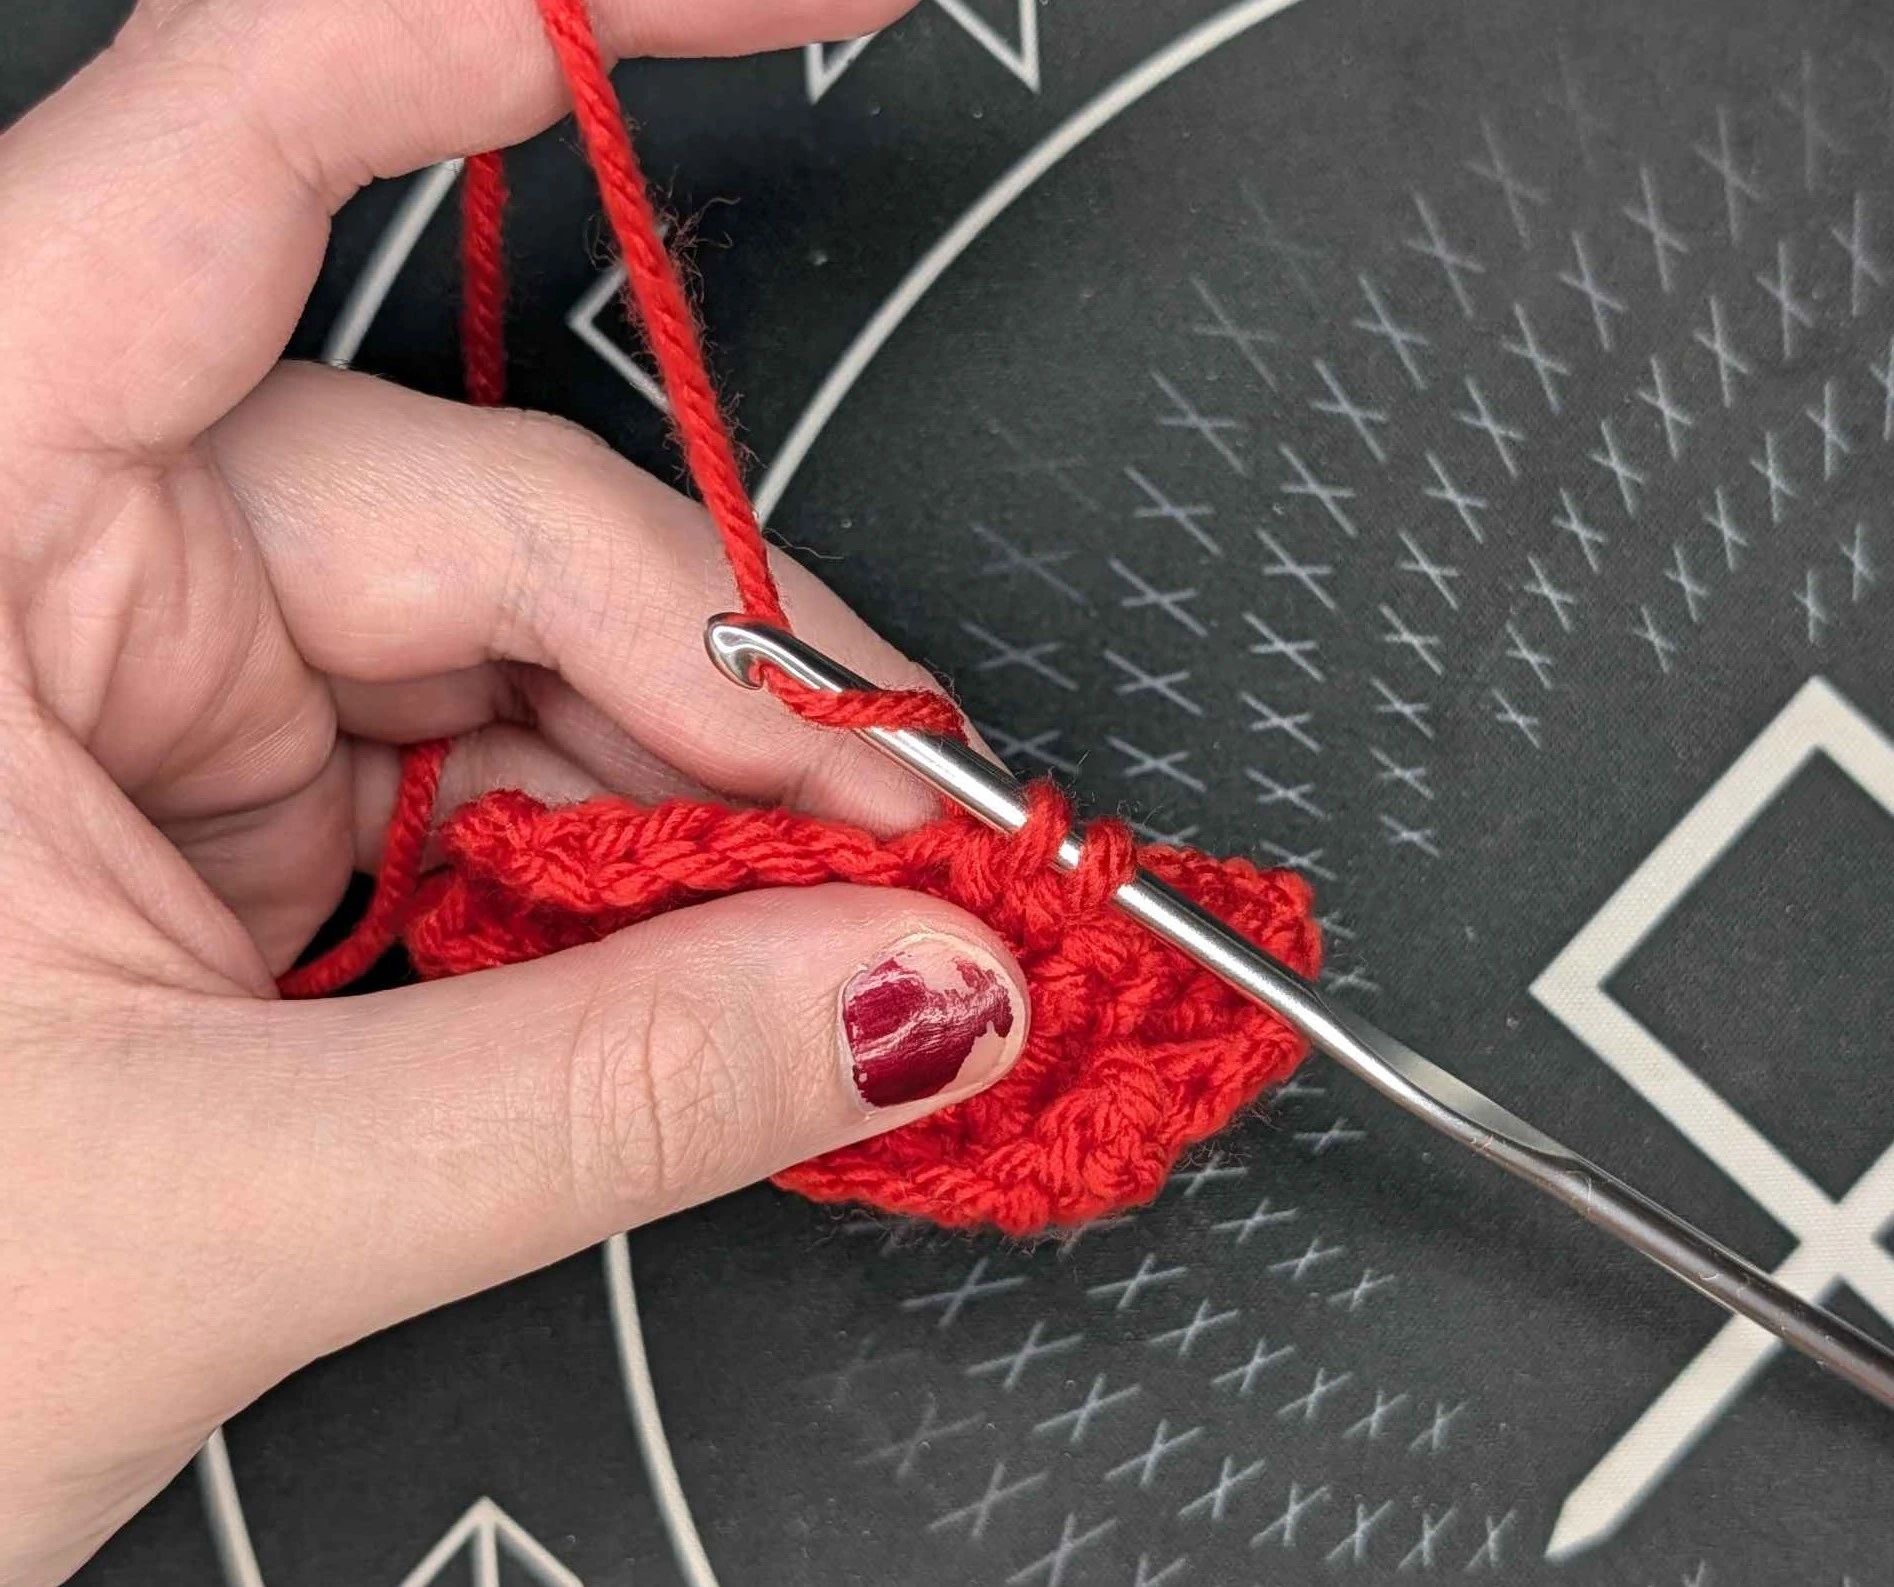
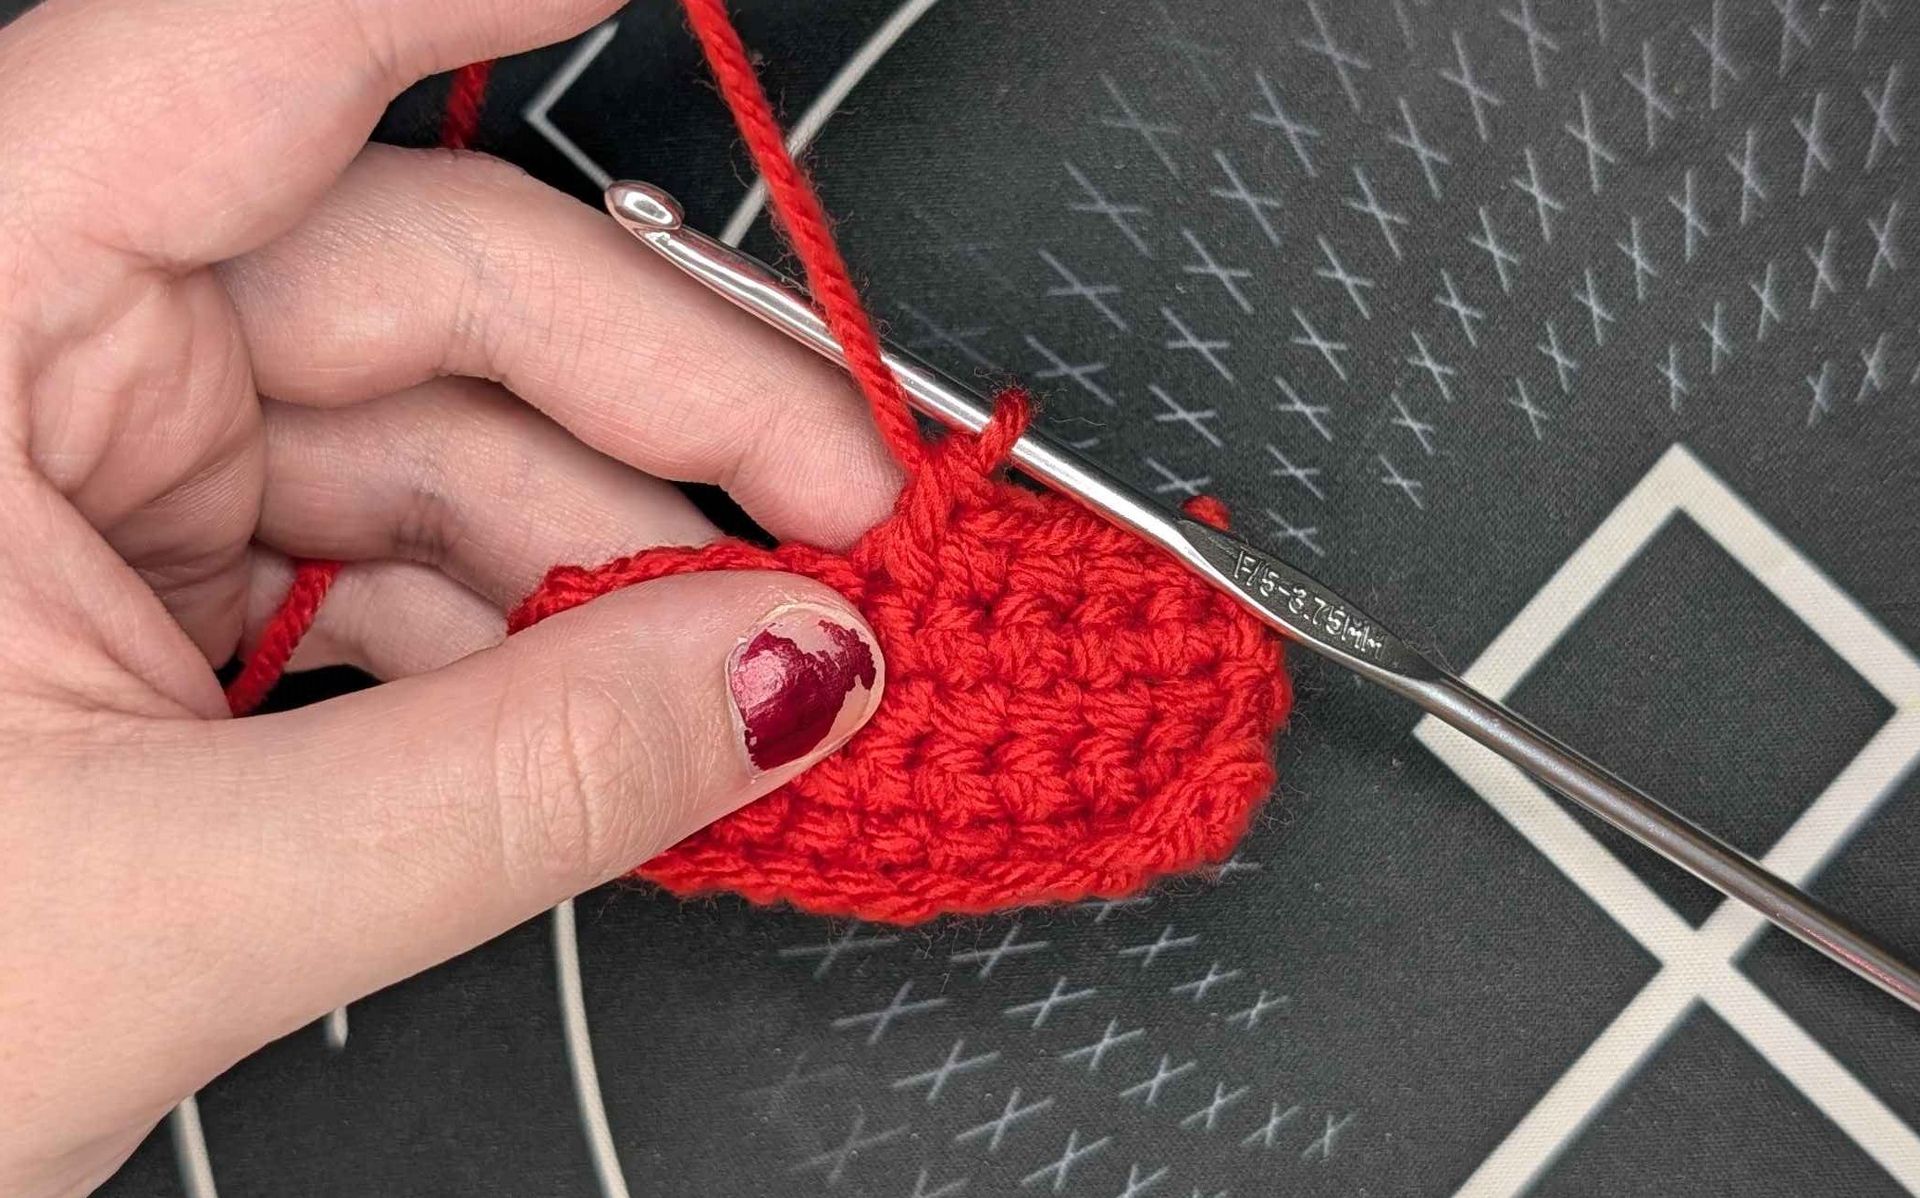
Invisible Decrease
Now let's talk about the invisible decrease. This is much more common in amigurumi since it eliminates the gap between stitches. It's written the same as a regular decrease using dec or sc2tog, so you have to have the knowledge of the differences between them in order to use each one in the appropriate situation.
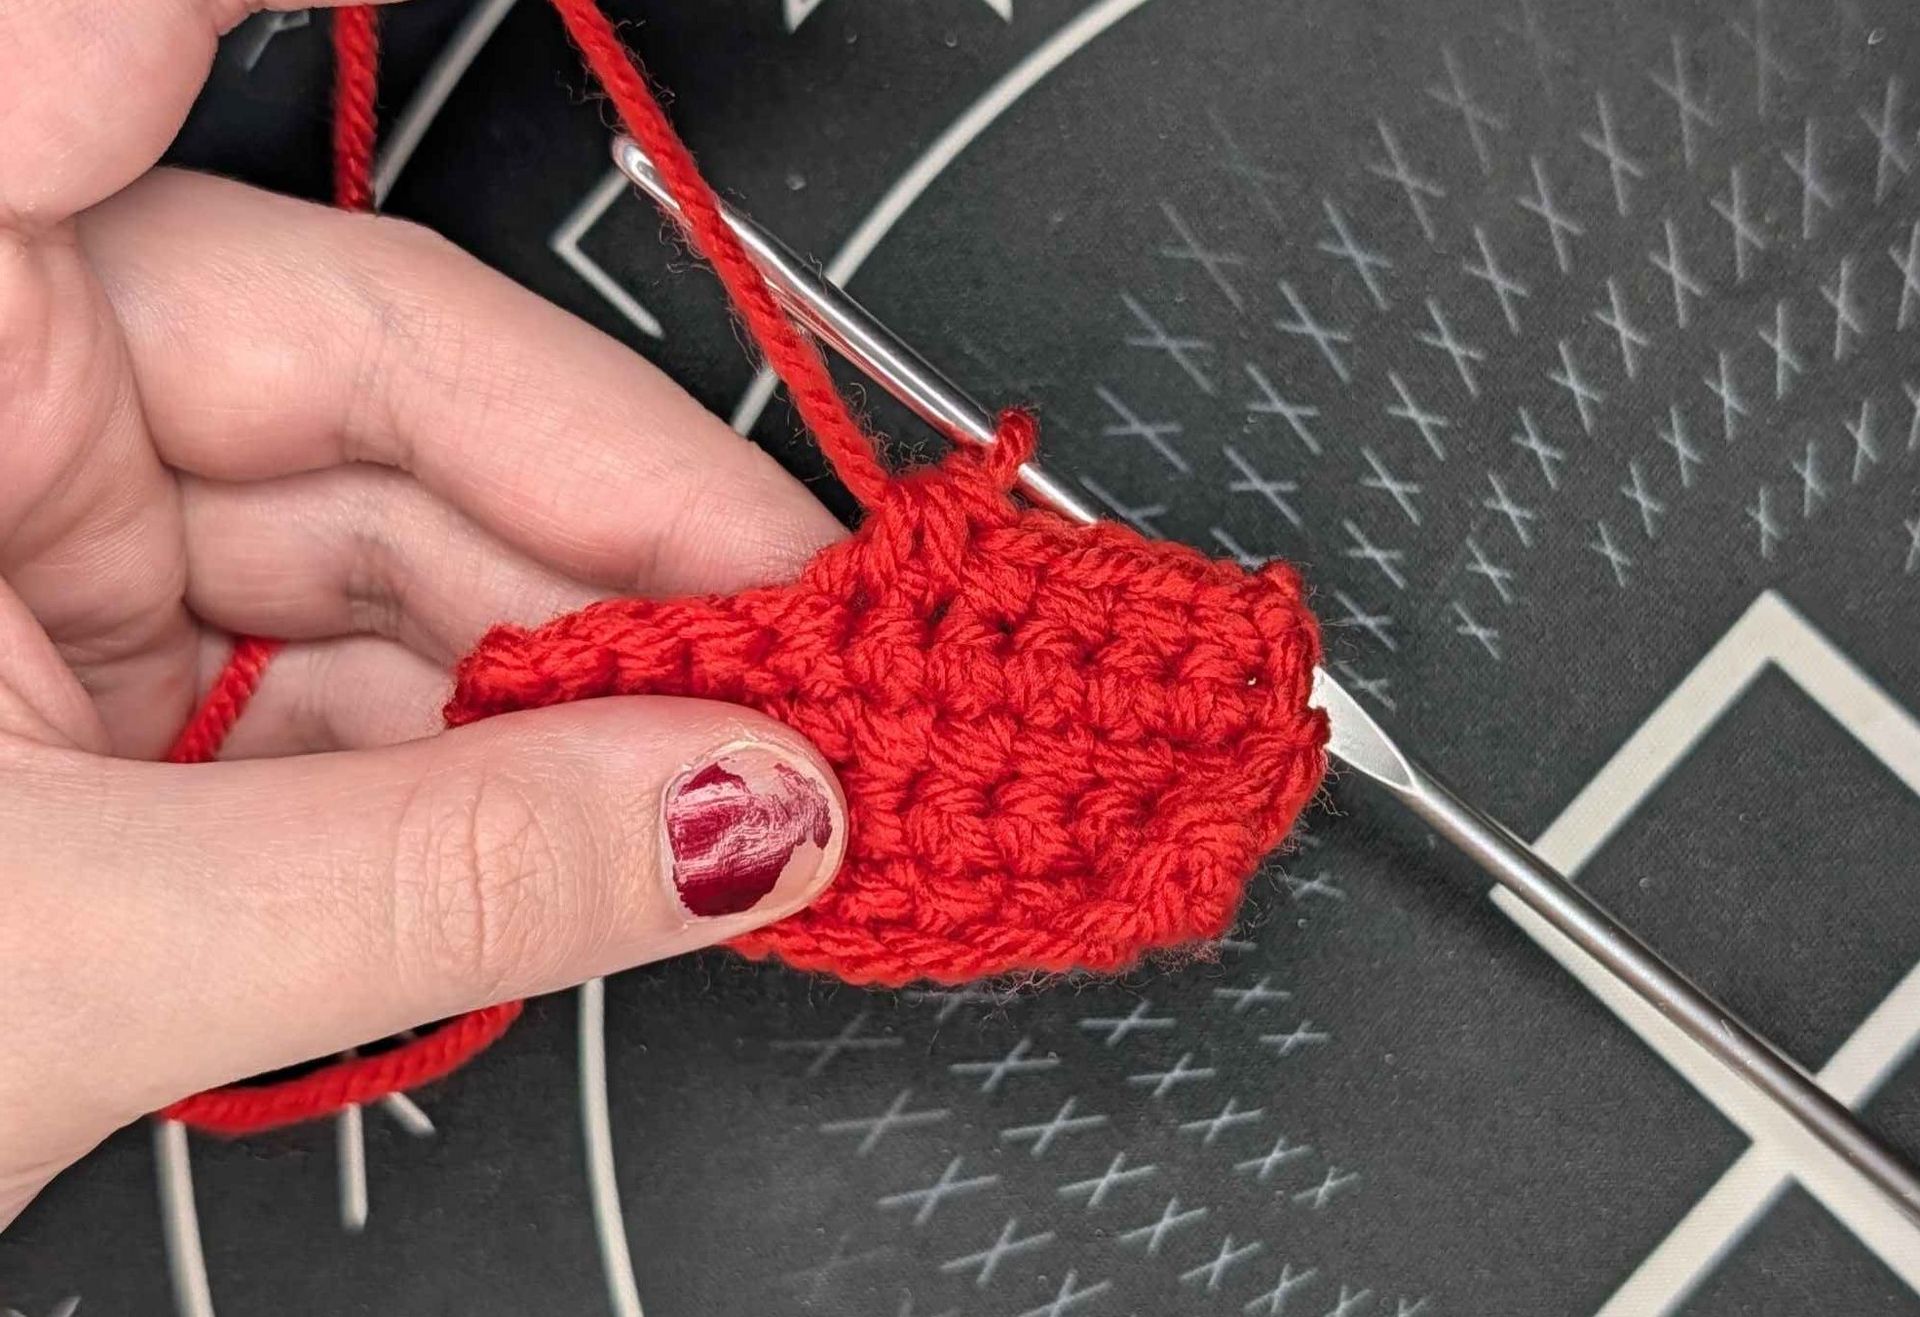
How to do an invisible decrease:
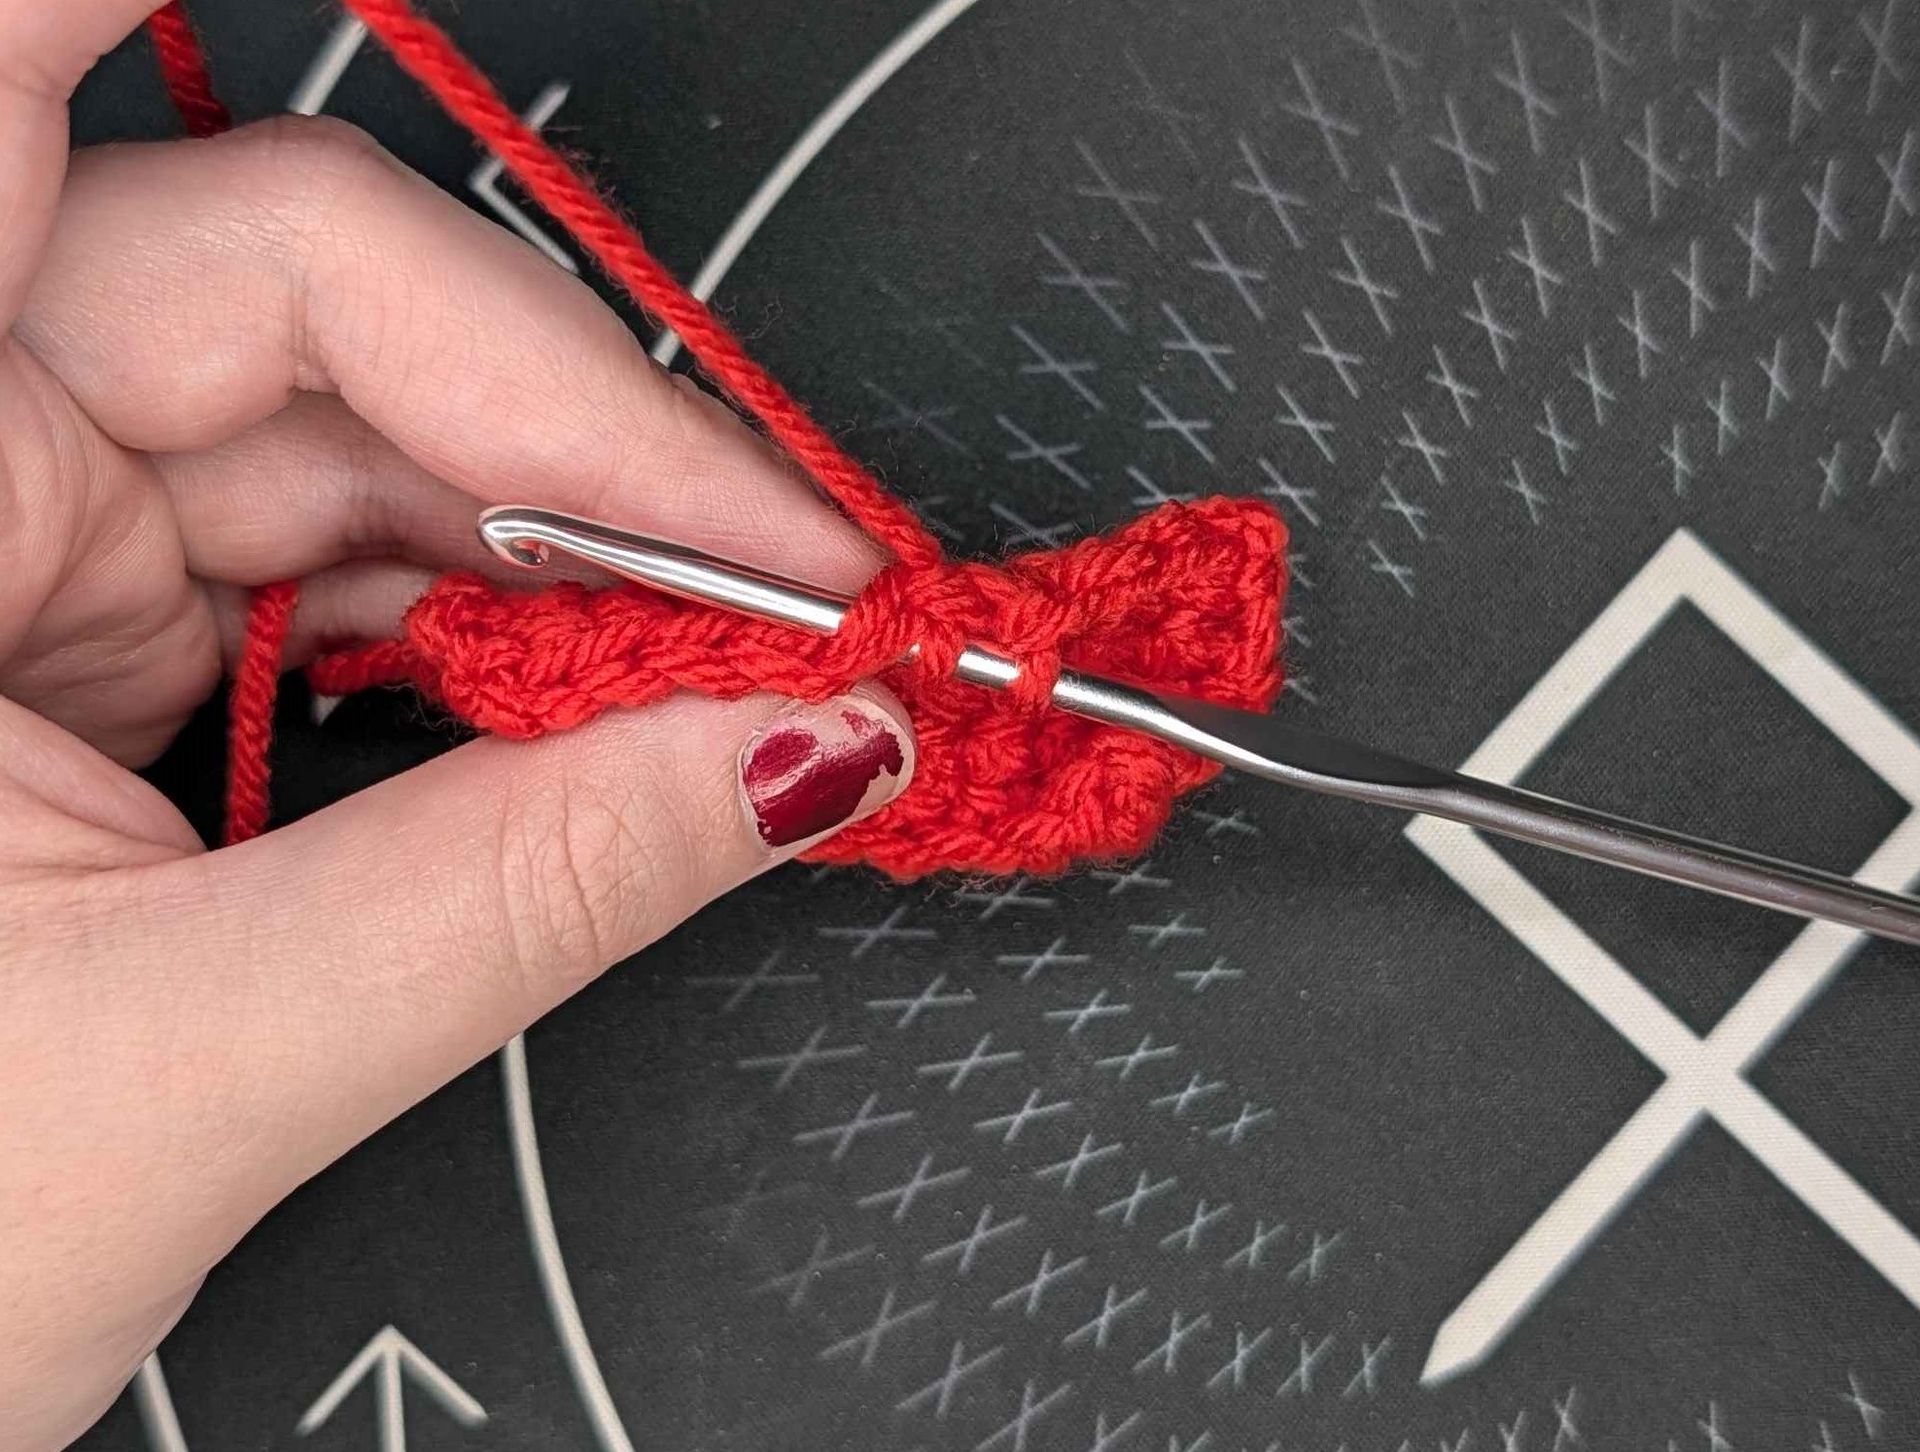
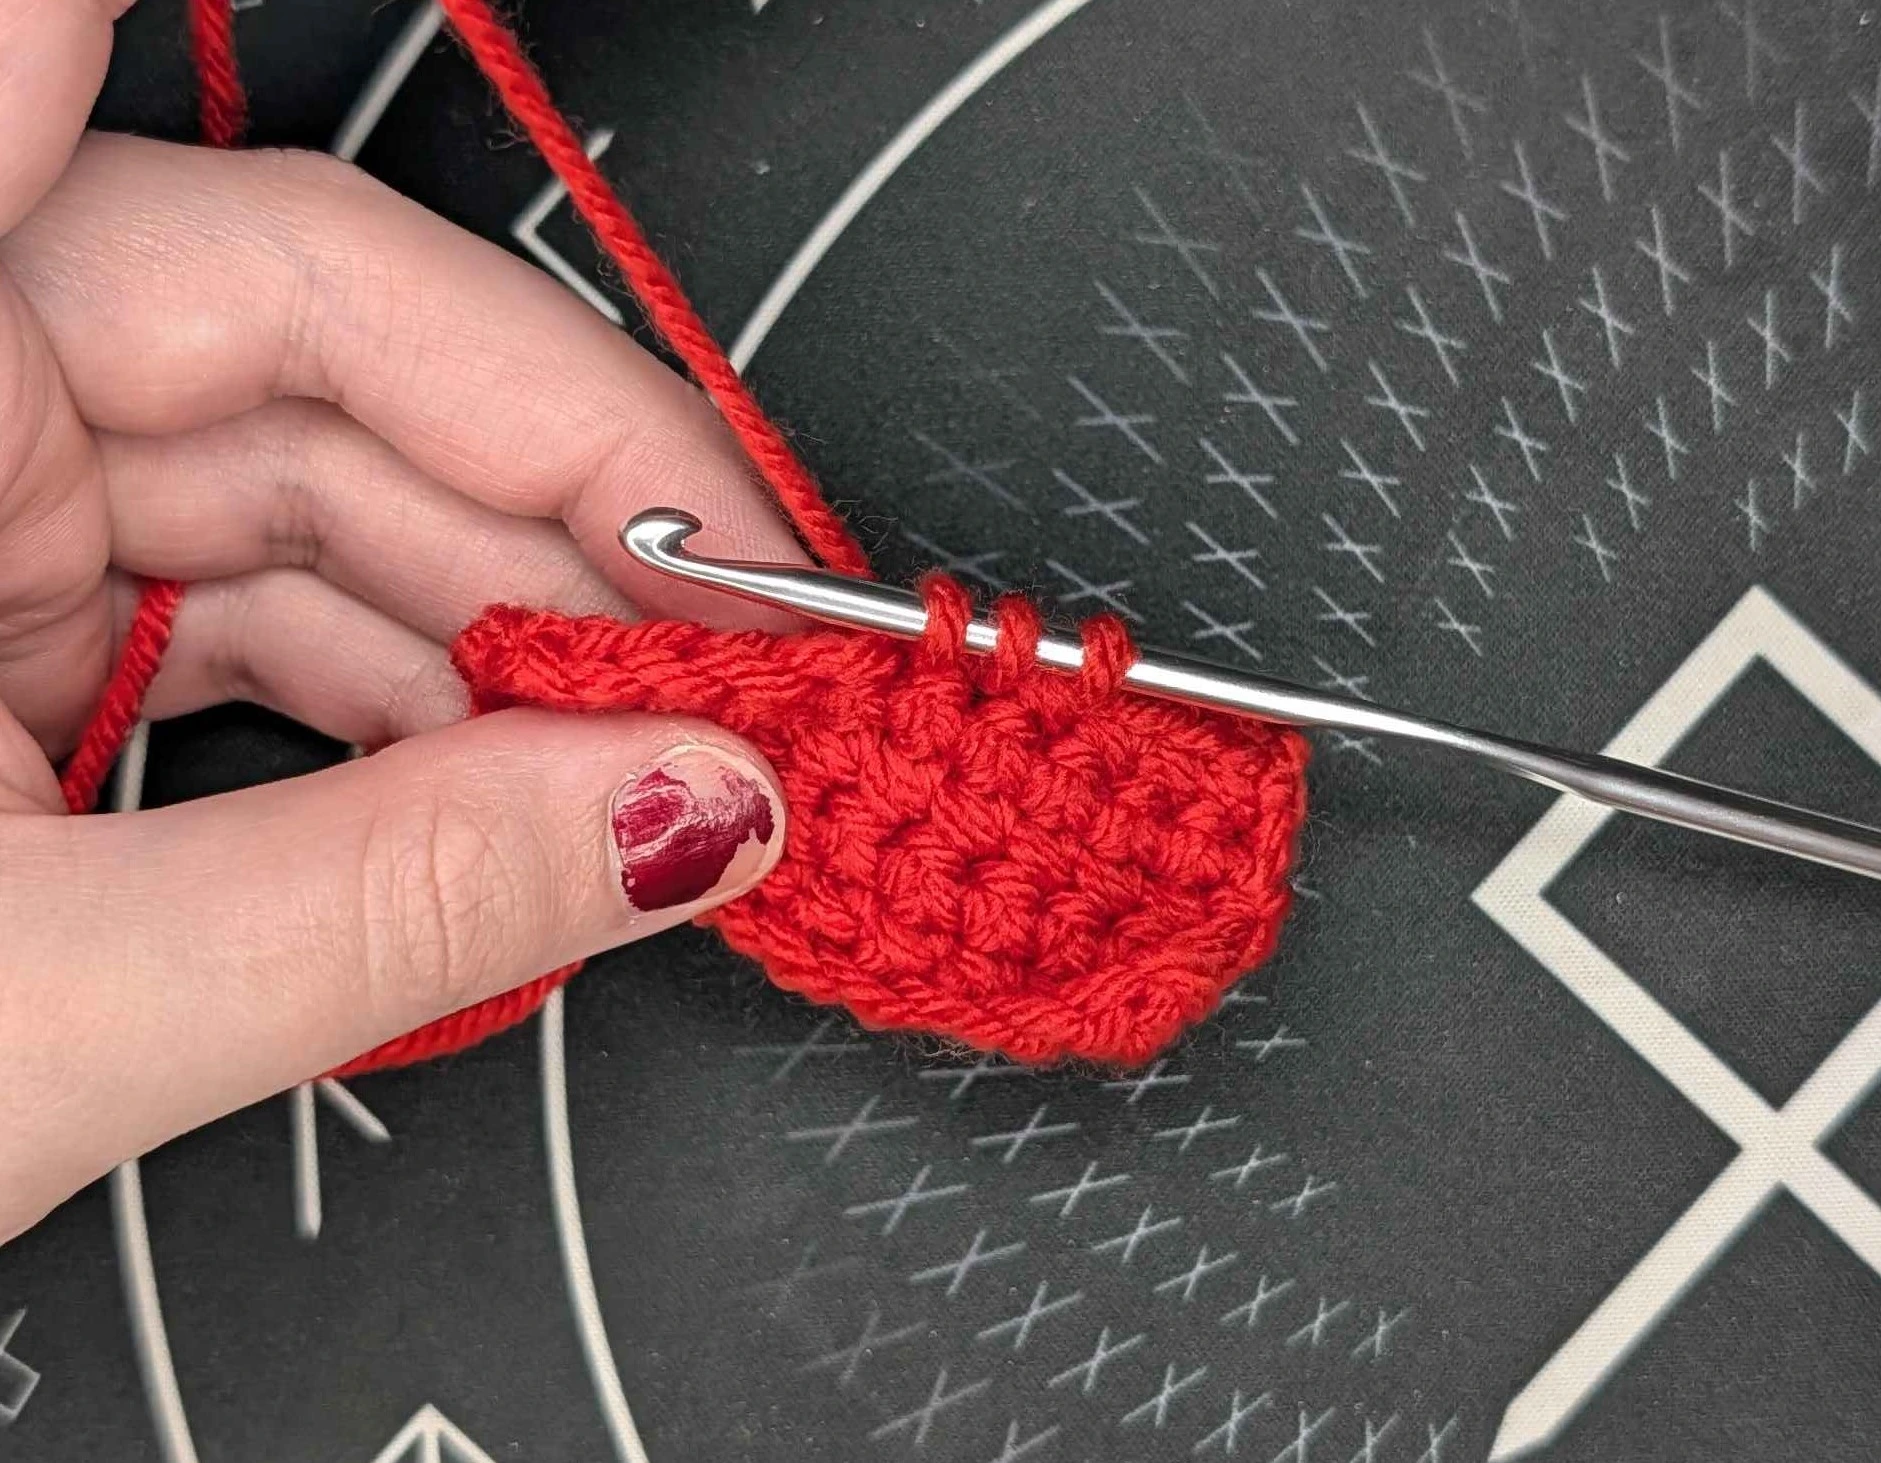
- Insert your hook into the front loop only of your first stitch. Do NOT yarn over yet!
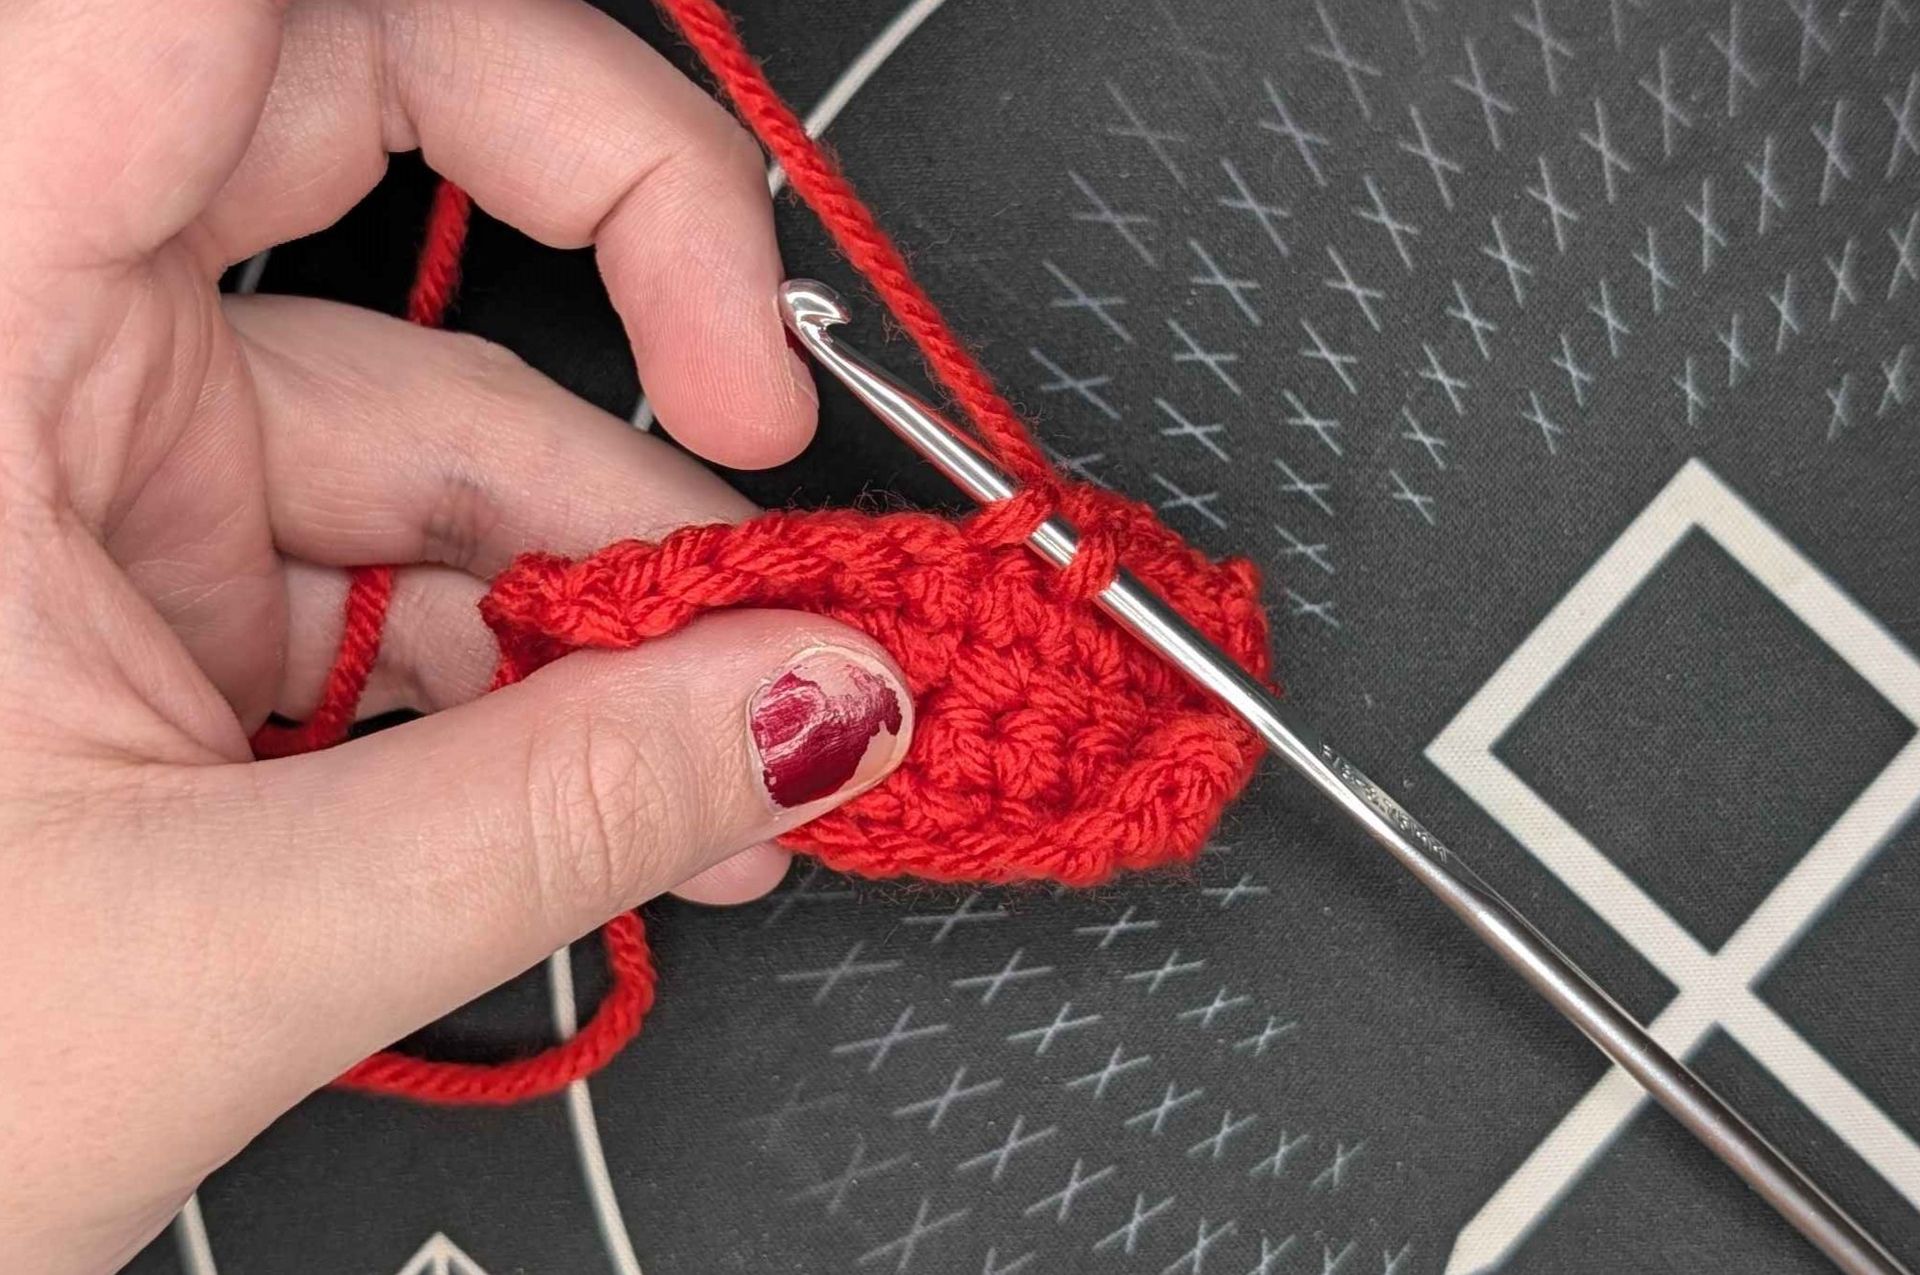
- Insert your hook into the next stitch into the front loop only again.
- Yarn over and pull through the loops you just inserted your hook into (should have two loops on your hook).
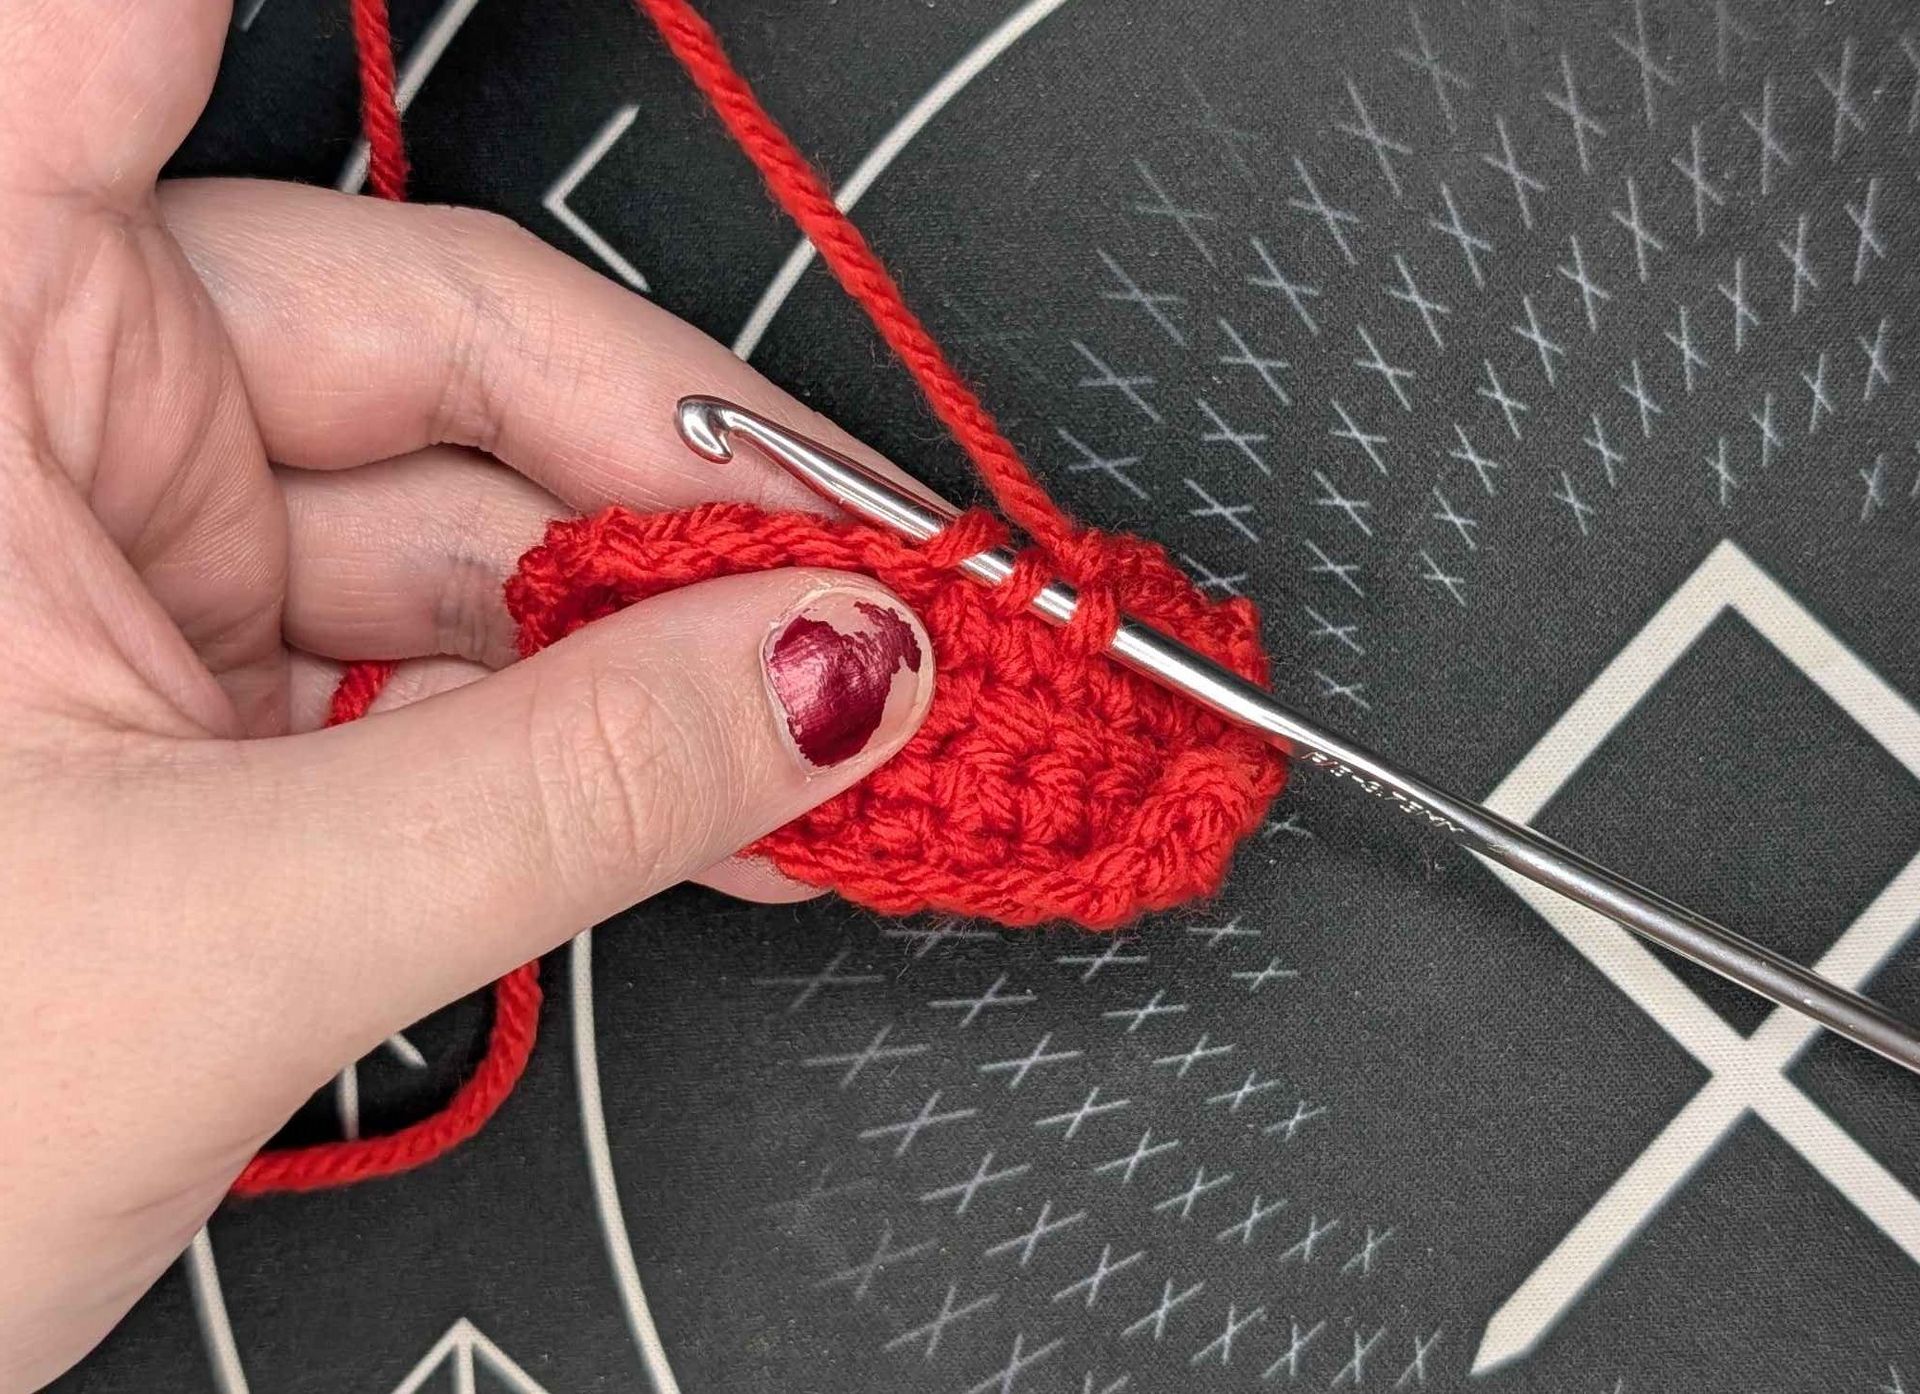
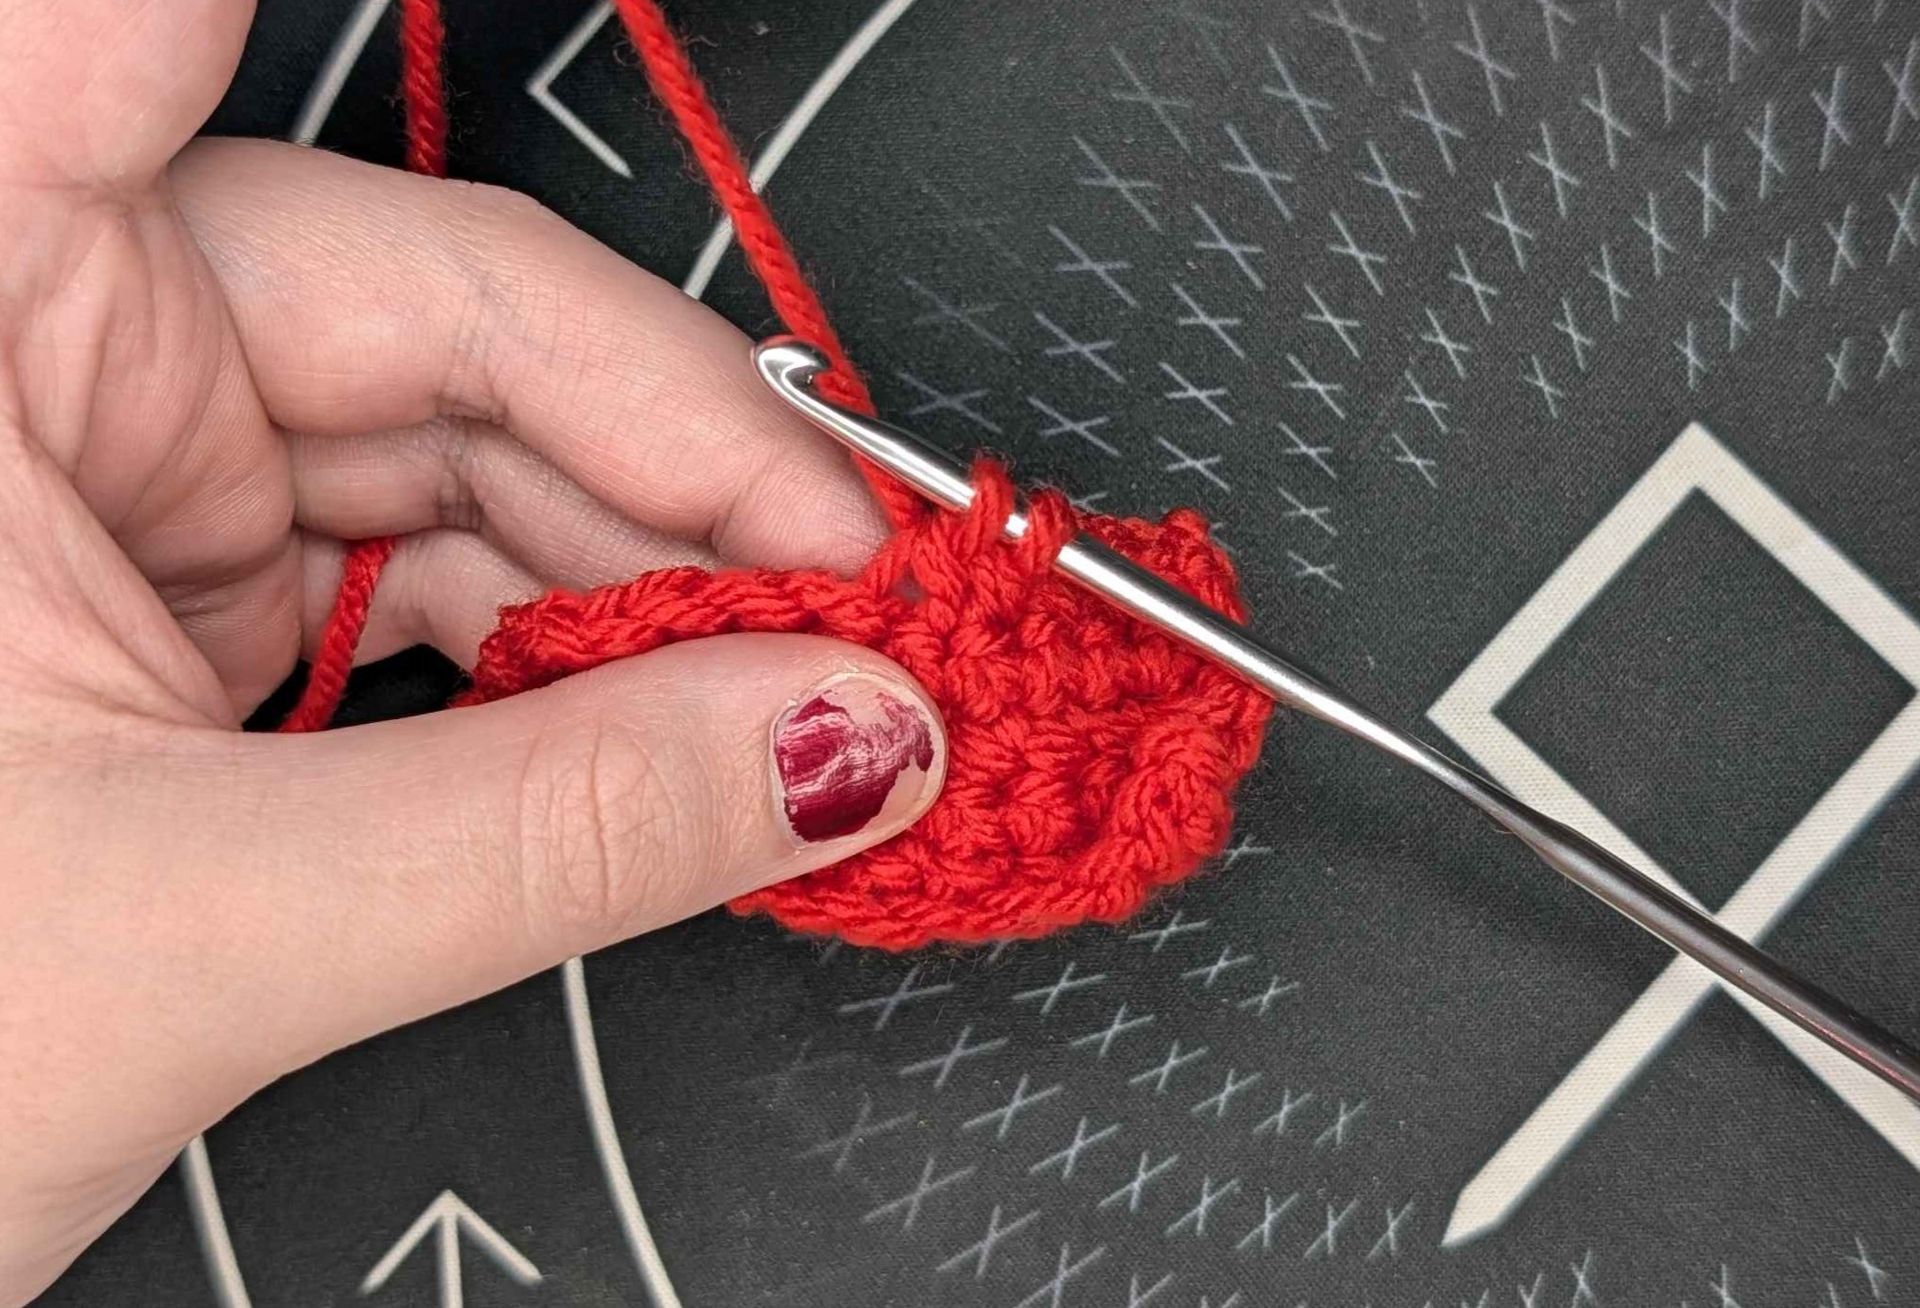
- Yarn over again, pull through the remaining two loops to finish the invisible decrease.
Let's look at the pros and cons for the invisible decrease:
Pros:
- No gaps left in your project since it pulls the stitches together, keeping the stuffing hidden in amigurumi projects.
- It leaves a smoother finish, avoiding that small bump that is created with a regular decrease.
Cons:
- It can be annoying to try and figure out at first, but it's worth it once you get the hang of it.
- The backside of the stitch looks messy, so this stitch is not considered reversable and is best for items where you don't see the other side.
Which one should I use?
We've created this handy chart for you! Look through and find the project you're working on, and the appropriate decrease will be marked next to it. If your project isn't on this list, and you're unsure, ask yourself: is the project going to be seen from the other side?
Project | Decrease | Invisible Decrease |
Granny Squares | ✔️ | ❌ |
Blanket | ✔️ | ❌ |
Shirts | ✔️ | ❌ |
Sweaters | ✔️ | ❌ |
Hats* | ✔️ | ✔️ |
Scarves | ✔️ | ❌ |
Mittens/Gloves | ✔️ | ❌ |
Bags | ✔️ | ❌ |
Amigurumi | ❌ | ✔️ |
*Hats are a bit of a special exception. Using an invisible decrease along the top of a hat makes the top look smoother, but a regular decrease works just as well! Try out each type of decrease with a hat and see what you prefer.
If you have any questions, comment below and we'll be happy to help! Happy crocheting!