
If you have ever followed a crochet pattern for a stuffed animal and found yourself staring at a tiny, annoying hole right at the top of its head, you are not alone. There's two common methods to starting amigurumi, the magic circle and a "chain 2" method, and why the magic circle is superior to the chain 2 method.
The chain method is when you chain 2, then start your stitches in the first chain. The chain method will more frequently cause a little hole at the start of your plush, usually due to the first chain being too big for the amount of stitches inside it and being unable to tighten the first chain. This is especially important so that your amigurumi looks professional with no holes, and so the stuffing doesn't start to come out unnecessarily.
We can easily fix that problem with something called a magic ring (referred to as a 'MR' in a pattern). The magic ring is one of the first techniques that beginners will learn because of how important it is (and how well it works!). Some patterns call for the chain 2 method instead of a MR, but we'll get into all of that so you're well prepared.
What is a Magic Ring?
Think of the Magic Ring as the opening of a drawstring bag. Instead of crocheting into a fixed chain, you are crocheting over an adjustable loop of yarn. When you are finished with your first round or two, you can pull the tail of your yarn and the center hole will pull tight, leaving no hole in your amigurumi.
Magic Ring Step-by-Step
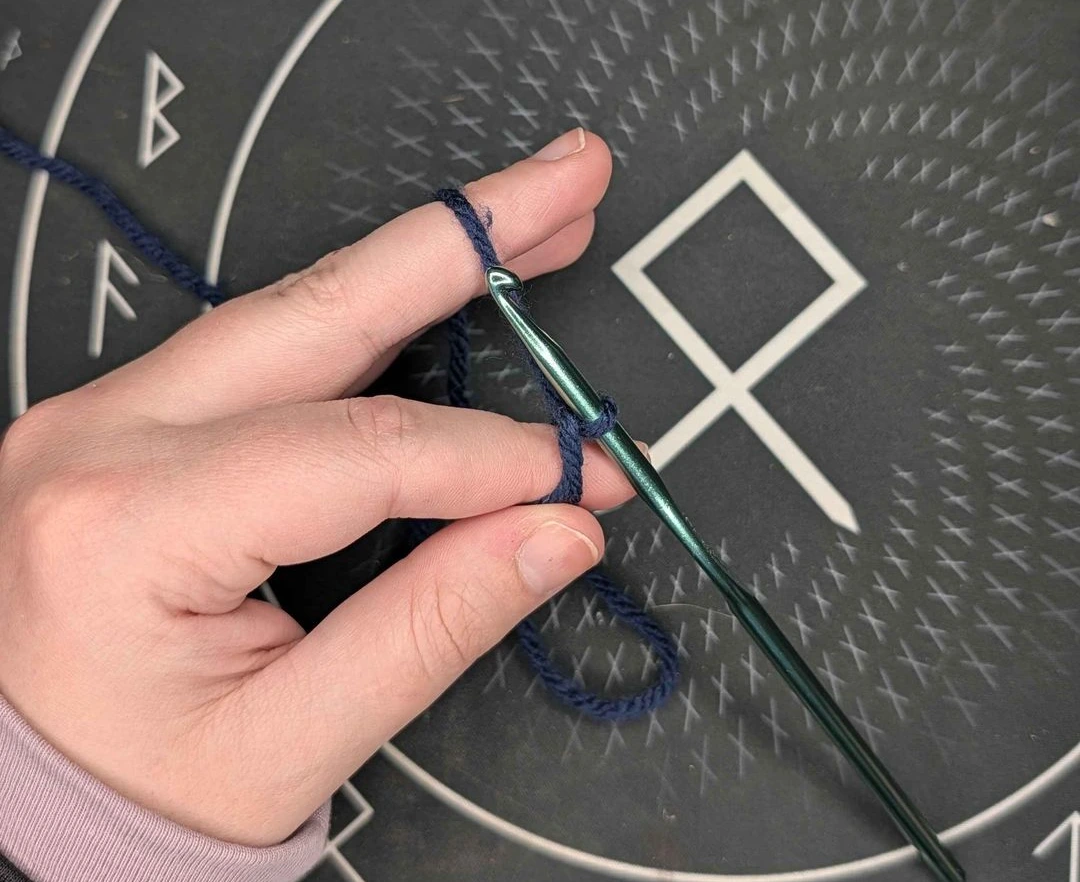
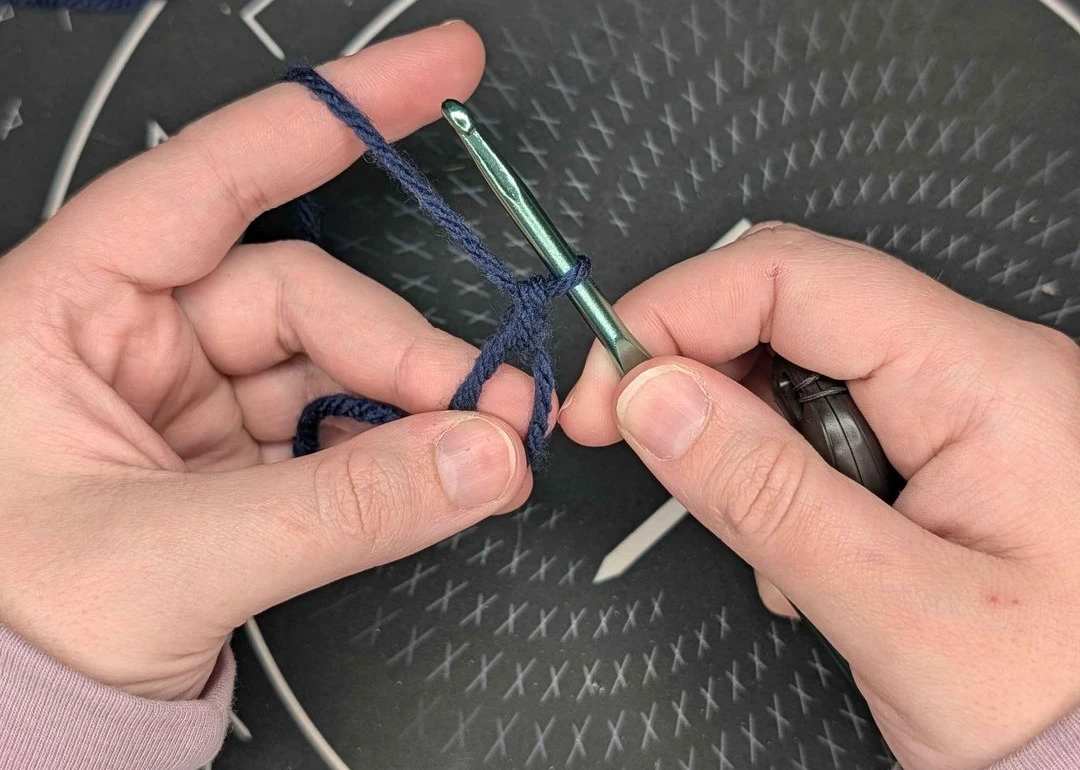
Lay the tail end of your yarn across your left palm, holding it down with your thumb. Wrap the working yarn around your index finger to form an "X" facing you with the yarn.
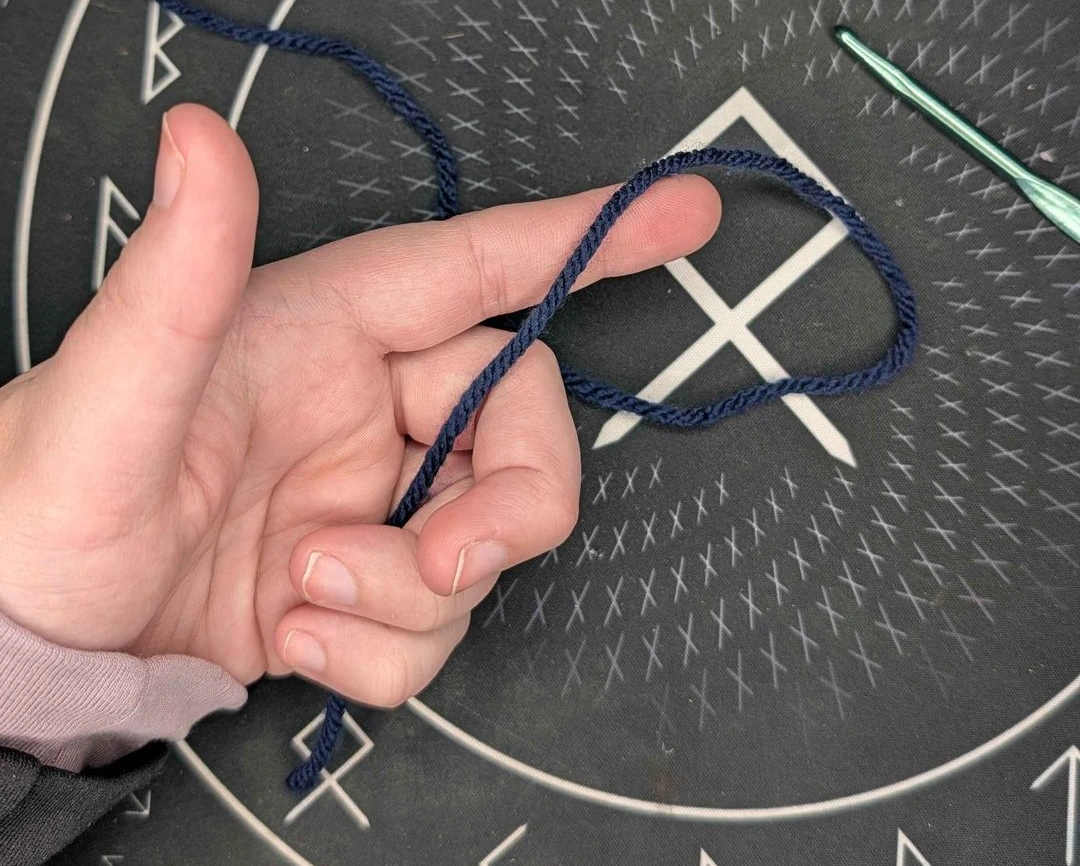
Hold your hook with your right hand. With your left hand, press your thumb into the middle of the X to make sure it doesn't move around a lot.
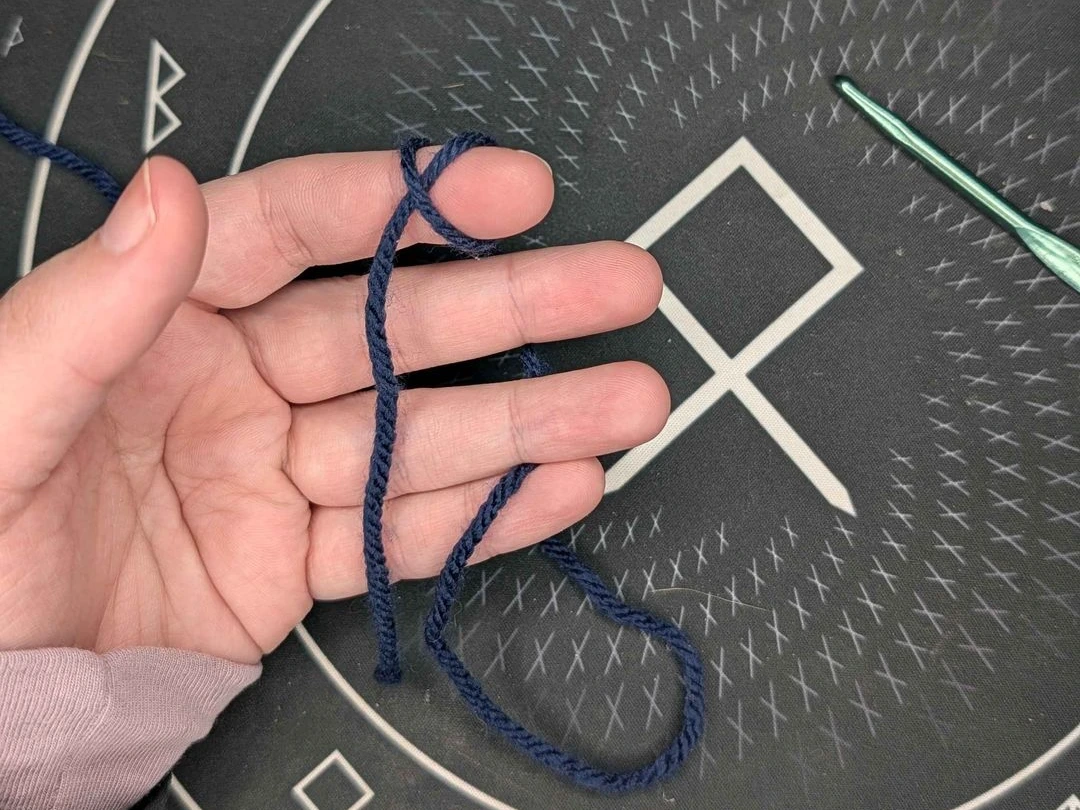
- I like to wrap the working yarn around my pinky to retain tension here. You can also simply hold it between your ring finger and pink as well.
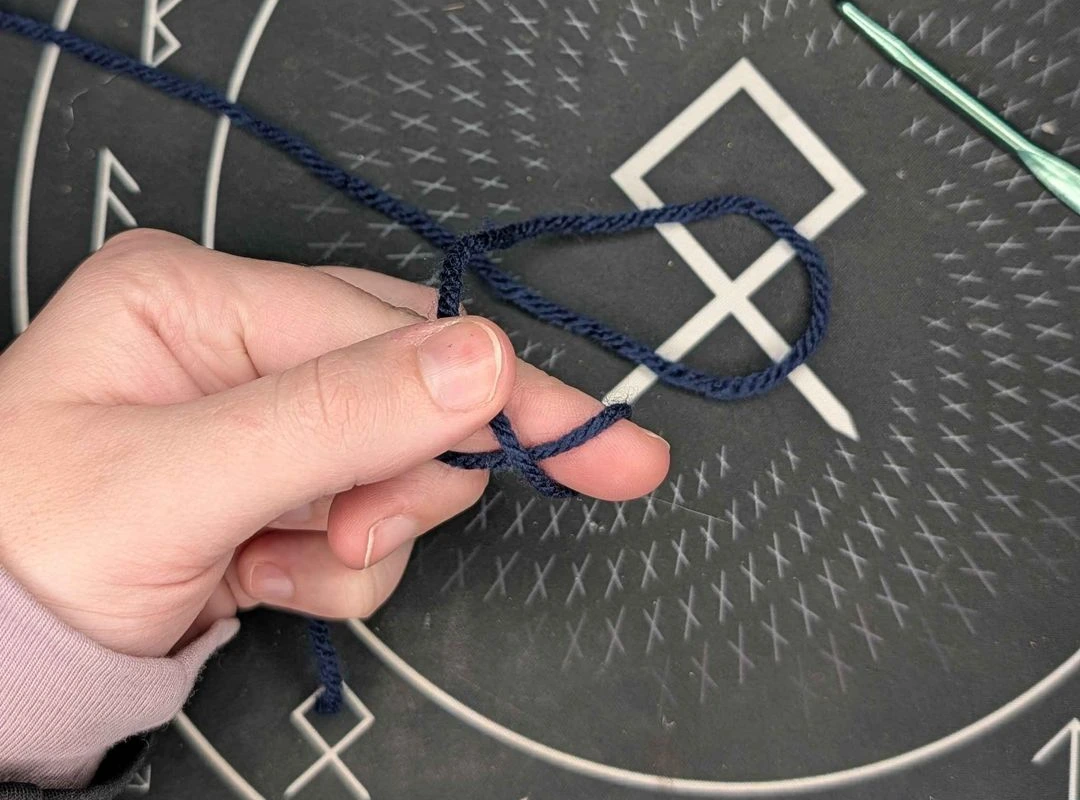
- Insert the hook under the top right leg of the "X", and grab the top left leg of the "X" with your hook. Pull the top strand under the bottom strand, and twist your hook up, leaving a loop on your hook.
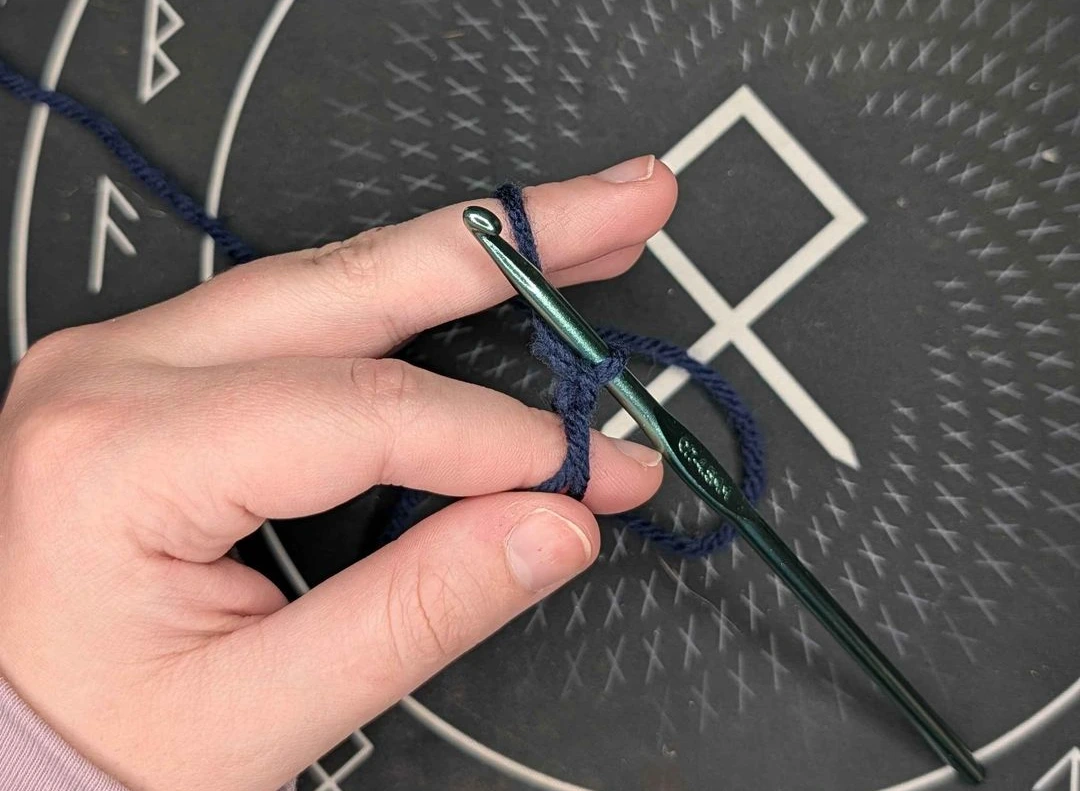
- Still holding the X with your left hand, pull the working thread through the loop on your hook, just like a chain stitch. And voila! Your MR is complete. You can now completely let go with your left hand, and if you hold up your hook and it doesn't come loose, you've done everything correctly.

To stitch into your MR:
- Holding the working yarn in your left hand, you'll start stitching into the circle that your hook is holding. I like to hold the MR with my left thumb and middle finger so it doesn't move around.
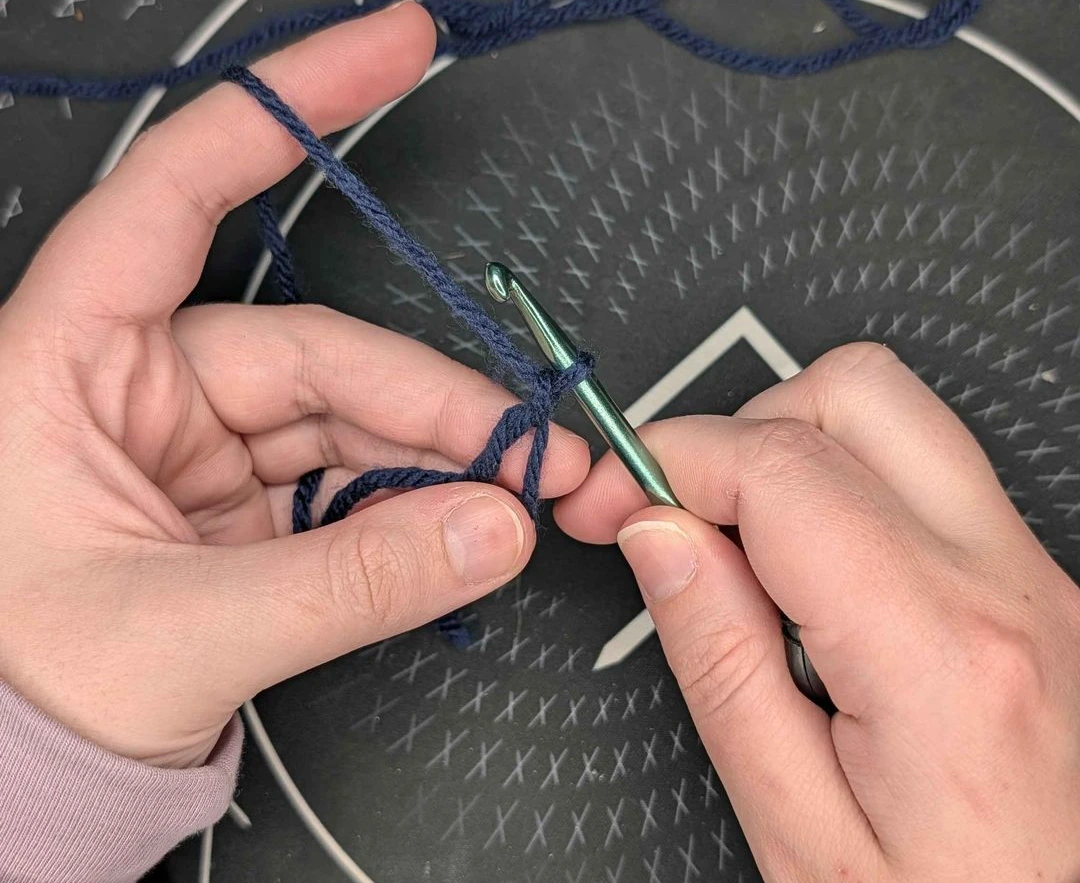
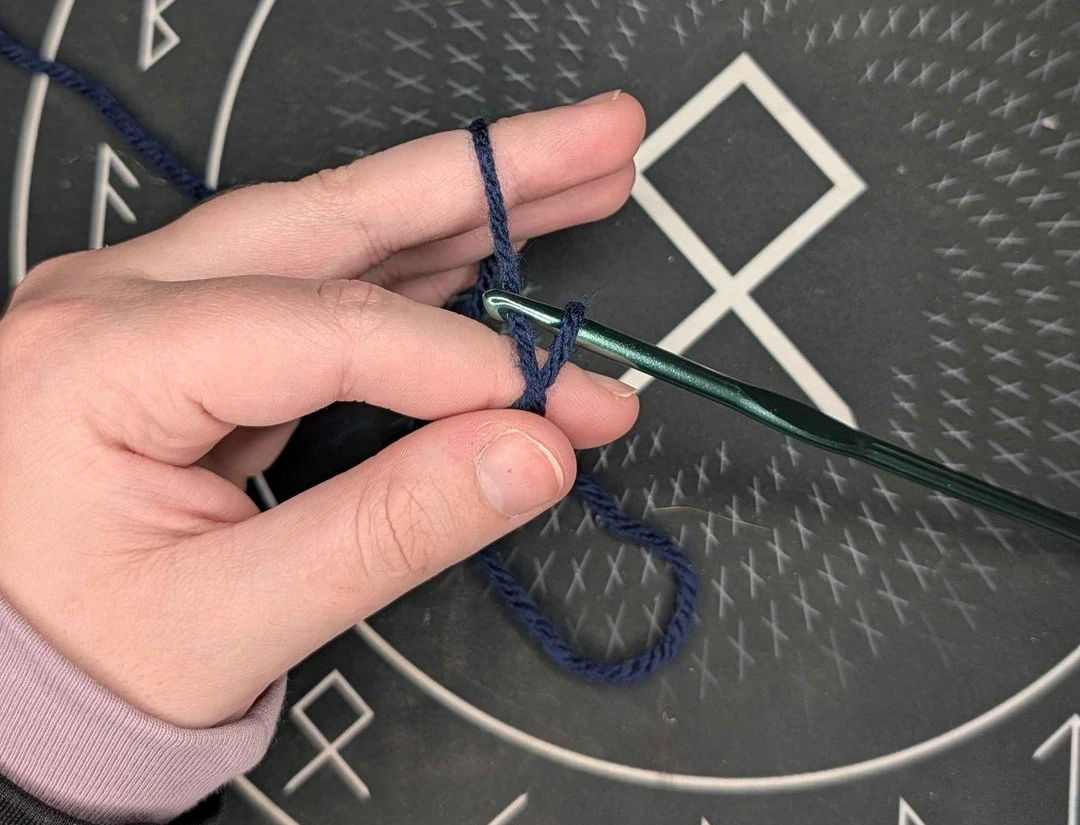
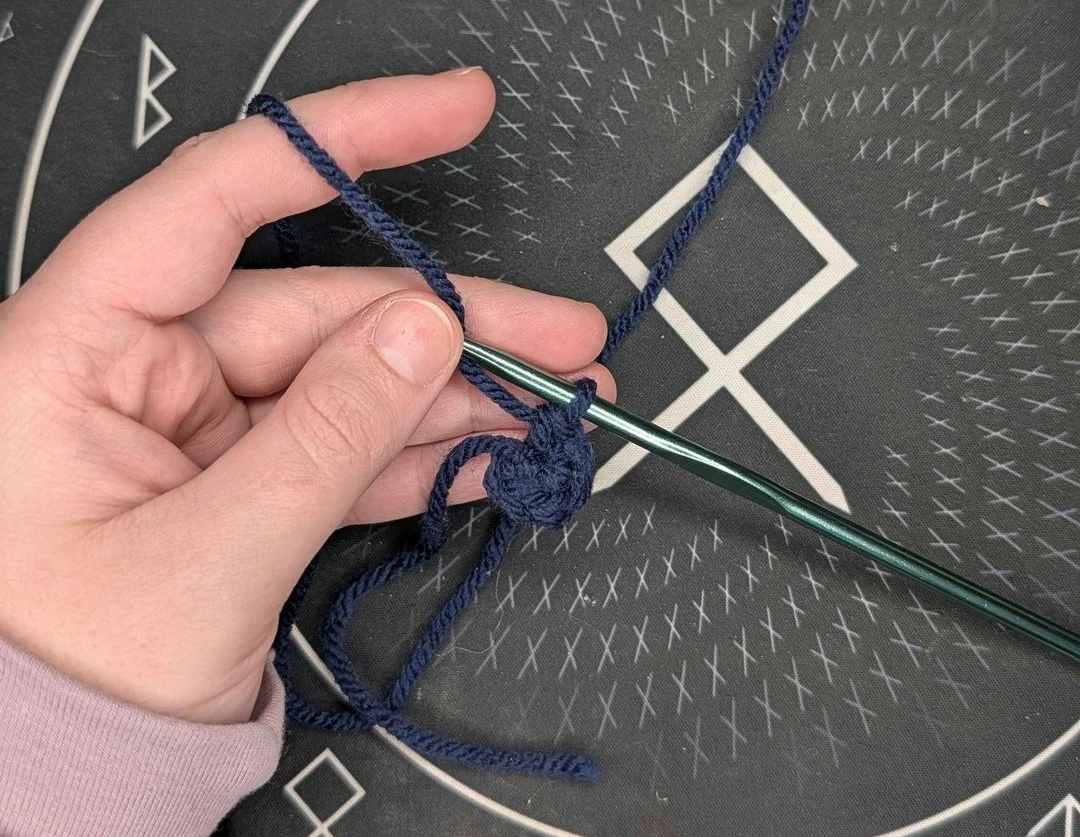
Insert your hook into the ring, pull the working yarn through just like a regular stitch. You should have two loops on your hook.
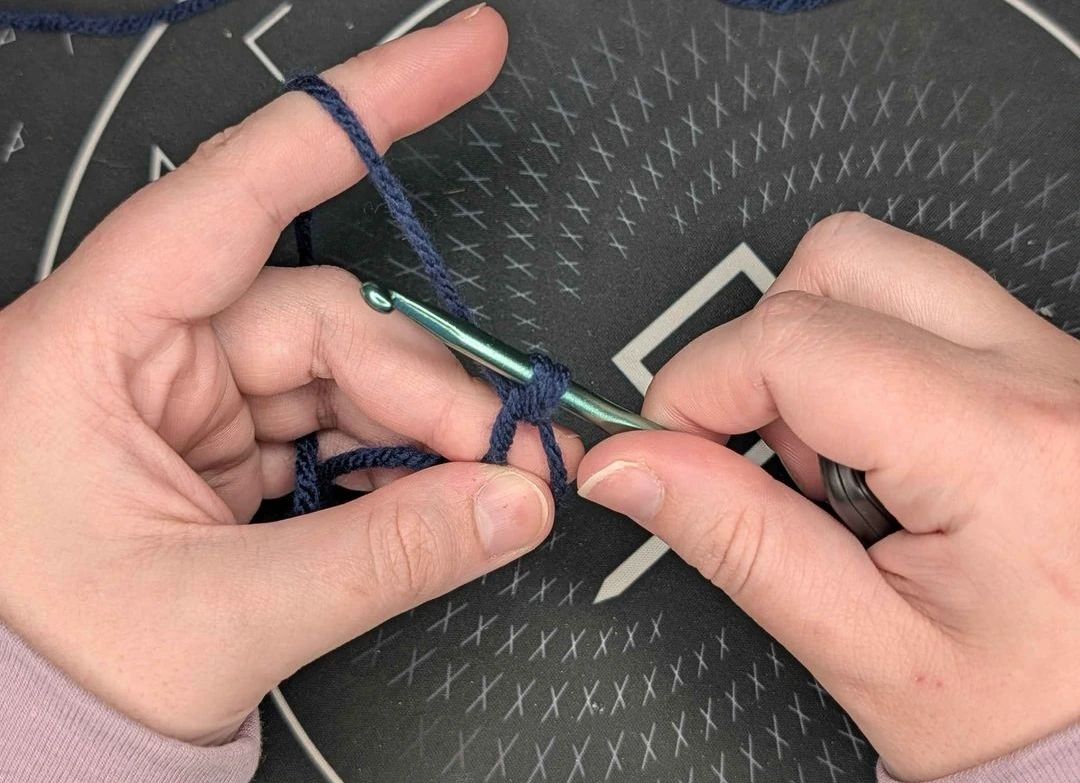
- Crucial Tip: Make sure you are crocheting over BOTH strands of the ring (the loop itself AND the loose tail). If you don't crochet over the tail, the magic won't happen!
- Grab the working yarn with your hook again, and pull through the two loops on your hook. Now you've just done your first single crochet into a MR!
Amigurumi usually starts with 6 single crochet into a MR. You've done 1 sc, so complete 5 more single crochet and it should look like this image.
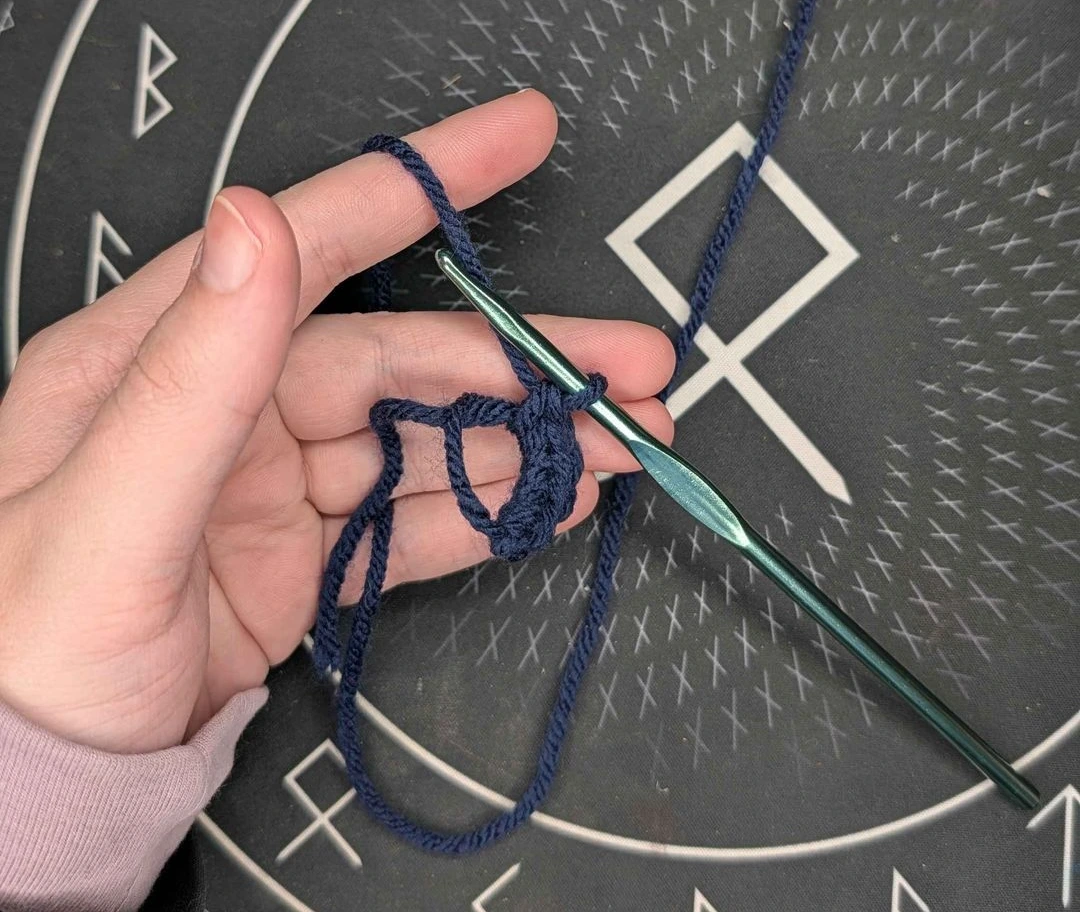
Grab the tail of your yarn that you've been single crocheting over, and hold the stitches with your right and pull! This should close your MR, and tighten the hole that you've just been stitching into. And now you have a MR with 6 single crochets in it - the perfect start to a typical amigurumi project. Congratulations!
Watch the full video tutorial to see it step-by-step!
Tips and Tricks
"Help! My Ring Won't Close!"
If you are tugging the tail and nothing is moving, there are likely two reasons that this is happening:
- You didn't crochet over the tail. If the tail is free-floating, and you didn't crochet over it when working stitches into your MR, it can't act as the drawstring. You will need to start over and make sure your hook goes under both strands every time.
Your tension is too tight. If your first round of stitches is incredibly tight, the yarn can't slide. Try loosening up the tension.
How to Restart Your MR
This is super simple! Take your hook out of your project, and holding the working yarn in one hand and your tail end in the other, pull! Your stitches should undo easily, and your MR should become undone in the same way.
Secure Your Ends!
While the Magic Ring is amazing, it is not a knot. If you cut the tail right away, your project will unravel. Always use a yarn needle to weave that tail back and forth through the inside of your work to lock it in place permanently.
About the Chain 2 Method
While the chain 2 method does not allow you to pull the loop closed tight, it does have one purpose that I like to use it for - specifically when working with chenille yarn. As a beginner, you shouldn't be working with this yarn yet, but once you get more experience and want to branch out the chain 2 method is perfect for working with chenille yarn because the yarn is so fragile. Adding too much tension (like when pulling your MR shut!) will cause the yarn to break, and you'll have to restart your project over, often throwing away the chenille yarn from the MR.
A lot of patterns will call for the chain 2 method as the start. Don't panic! You can absolutely substitute in the MR for it instead and continue with the pattern as normal.
Practice Makes Perfect
Don't be discouraged if it takes you more than a couple of tries to get the hand movements and tension down. Once you master it, you’ll be able to create professional, leak-proof centers for your amigurumi and other projects.